Friday, 30 December 2016

Stained Glass Technique

Hi everyone, sharing a quick post today on the Stained Glass Technique.  There is a great tutorial on Splitcoaststampers here.


I embossed my image, from the 'Touches of Texture' stamp set using Silver as I liked the finished look better than the White embossing powder.  The sentiment is from the 'Balloon Celebrations' stamp set.


The image was coloured using Wisteria Wonder, Elegant Eggplant, Old Olive and Always Artichoke Stampin' Write Markers.

The card base is Wisteria Wonder and the patterned paper is from the Subtles Designer Series Paper Stack.  A few silver metallic enamel dots were added to finish the card.

You can get all the supplies you need for this project from me.

You can place an order online and join in the fun with the On-line Club or Contact Me and place an order.


Thank you for visiting.

Carolyn

Wednesday, 28 December 2016

Thank You ...

Hi everyone, sharing a design I cased from Angela Maine on my card today.   I have used Stampin' Up! products which created a different look to the card, but the actual design and layout I cased from Angela.


The flowers from the 'Grateful Bunch' stamp set were stamped with Early Espresso and coloured using Peekaboo Peach and the Clear Wink of Stella pen (in case you had not noticed I love the finished look of the Wink of Stella pen).  The flowers were then punched out using Blossoms Bunch punch.  The leaf and stem image was stamped with Always Artichoke and again coloured using the Clear Wink of Stella pen.

I used the Seasonal Decorative Mask (these are still available on the Year-End Closeouts specials for $7.00 AUD, but only until 3 January 2017) along with some texture paste for the background.  I also used the Flourish Thinlits dies and the Layering Circles and Stitched Shaped Framelits.    The Thank You sentiment is from the stamp set 'Flourishing Phrases"

You can get all the supplies you need for this project from me.

You can place an order online and join in the fun with the On-line Club or Contact Me and place an order.


Thank you for visiting.

Carolyn

Tuesday, 27 December 2016

Purse Notebook

Hi everyone, wishing you a belated Merry Christmas and a Happy New Year.  I had a great Christmas Day with my brothers, sister-in-law and nephews having lunch together before we went and spent the afternoon with Mum at the Nursing Home.  It was a delight to see her face light up when we all trooped in with our presents and then giving her all the hugs and kisses.  We had a terrific time with her sharing a lot of laughter and just catching up.  It was good to see Mum still had her sense of humour.  She received a box of chocolates as one of her presents and after opening them she said "Now I suppose you want to help me eat them".  My nephews had a few, but we left most of them for her to enjoy.

Now to today's post.  I was recently given this cute little post-it note holder with a calendar for my purse by a good friend.  You know when you are trying to find something to write-on and you cannot find even a scrap of paper.


I thought that this is a terrific idea, but I am not sure if you are like me and you can also never find a pen either.  So I stepped up the design slightly and added a mini gel pen, now set and ready to go. I will be using the one that I was given at home as I also have the same problem of never being able to find anything to write-on when I need to jot something down, especially when I am on the phone and need to take down a phone number, date or other information.


For the covers I used the cardboard from the Designer Series Paper stacks and I also tried the cardboard from the Foil Sheet packs as this was slightly thicker.  I liked the finished looked using the cardboard from the Designer Series Paper stacks, but both worked out okay.

I have used a small disc magnet for the closure on my design as it was easier to open and shut.  The stamp set used is 'Flourishing Phrases' and I also used the coordinating 'Flourish' Thinlits to create the small flower on the inside.  I used the Stitched Shapes Framelits and the Layering Circles Framelits for the 'Just a Note' sentiment on the front cover of the holder.  The patterned paper is from the 'Blooms and Bliss' Designer Series Paper.

The ladies that attend my regular fortnightly classes will be making this in January.  After this time I will post the measurements and how it was put together.

You can get all the supplies you need for this project from me (does not include mini calendar).

You can place an order online and join in the fun with the
 On-line Club or Contact Me and place an order.


Thank you for visiting.
Carolyn

Tuesday, 20 December 2016

Can You Case It?

Hi everyone, sharing my card that I made for the Can You Case It Challenge based on this sketch.
143
I have used stamp sets Thoughtful Banners, Gorgeous Grunge and Grateful Bunch along with the matching Blossom Bunch Punch.


Colour scheme of Sweet Sugarplum, Crumb Cake, Copper and Early Espresso.

I love the stitched edging around the square which was made using the Stitched Shapes Framelits, it gives the square a great finish.

The flowers and leaf images were coloured using the Wink of Stella pen and Sweet Sugarplum for the flowers and Early Espresso for the leaf and stem.  It gives a lovely shimmer to the card.

A piece of Copper Metallic Thread was added along with some sequins to finish.

Thank you for visiting.

Carolyn

Sunday, 11 December 2016

Christmas Pines

Hi everyone, I am casing Brandy Barnard for my card today.  In the video show casing the Stitched Shapes Framelits, Brandy showed a label that she had done for a gift box.

I like it so much that I replicated the design onto a card.  It was actually quite a quick card to make, with the Stitched Shapes Framelits just giving that great finishing touch to the centre square.


You can get all the supplies you need for this project from me.

You can place an order online and join in the fun with the On-line Club or Contact Me and place an order.

Thank you for visiting.

Carolyn

Thursday, 8 December 2016

Cookie Cutter Christmas - More Projects

Hi everyone, as promised here are the other projects that I made using the Cookie Cutter Christmas stamp set and the Cookie Cutter Builder Punch.


I stamped and coloured so many of these little Santas, I could not seem to stop.   So they now appear on all the projects, poor old Rudolph did not get a look in.

Another Christmas Card that will be off in the mail soon.


A little gift bag that I have filled with lollies (candy or sweets depending upon where you live in the world, in Australia they are lollies) in a cellophane bag tied with the Real Red Stitched Edge Ribbon is the next project.


My last project is a little gift package full of lollies again.  These are for my work colleagues.  I made 27 of these little gifts, told you I stamped and coloured a lot of Santas.


The other items used are the Holly Jolly Greetings stamp set, Christmas Greetings Thinlits, Scalloped Tag Topper Punch, Triple Banner Punch, Real Red Stitche Edge Ribbon, Candy Cane Lane Baker's Twine, Candy Cane Land Designer Series Paper, Silver Glimmer Paper, Real Red and Basic Black Stampin' Write Markers, Fancy Frost Specialty Designer Series Paper, Metallics Sequin Assortment and Cardstock Basic Black, Whisper White and Real Red.

You can get all the supplies you need for this project from me.

You can place an order online and join in the fun with the On-line Club or Contact Me and place an order.

Thank you for visiting.

Carolyn

Wednesday, 7 December 2016

Falling in Love

Hi everyone, I am playing along with the Mojo Monday Challenge this week based on this great sketch.


I have used the new Falling in Love Designer Series Paper, So in Love stamp set, So Detailed Thinlits Dies, Falling in Love Embellishments and Very Vanilla 1/4" Satin Ribbon on my card. These are all coming our way on 4 January 2017


I made a little gift box to go with the card, using the So Detailed Thinlits dies to create the belly band. 


This would make a great present for someone special.


Thank you for visiting.

Carolyn

Cookie Cutter Christmas

Hi Everyone, have you ever made a card and liked it so much you just kept on creating with the same stamp set and colour scheme. This happened to me today when I created my card for the Retro Sketches challenge based on this great sketch.


As I still needed a few extra Christmas Cards I decided to use the Cookie Cutter Christmas stamp set and the Cookie Cutter Builder Punch for my card.


The other items used are the Holly Jolly Greetings stamp set, Christmas Greetings Thinlits, Scalloped Tag Topper Punch, Triple Banner Punch, Real Red Stitche Edge Ribbon, Candy Cane Lane Baker's Twine, Candy Cane Land Designer Series Paper, Silver Glimmer Paper, Real Red and Basic Black Stampin' Write Markers, Fancy Frost Specialty Designer Series Paper, Washing Tape and small stars left over from the Tin of Tags Kit and Cardstock Basic Black, Whisper White and Real Red.

Check back tomorrow to see the other projects that I have made with the Cookie Cutter Christmas stamp set and Cookie Cutter Builder Punch.


Thank you for visiting.

Carolyn

Monday, 5 December 2016

Falling Flowers

Hi everyone, I am playing along this week with Freshly Made Sketches.  

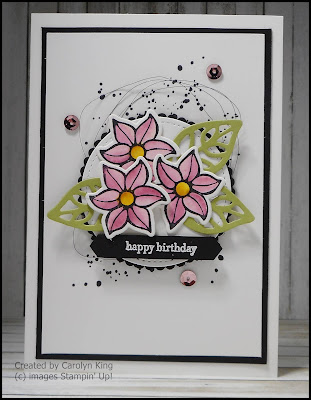
For my card I have used the Falling Flowers, Gorgeous Grunge and Teeny Tiny Sentiments stamp sets along with Layering Circles, Stitched Shapes and May Flowers Framelits dies.

The flowers were water coloured with Sweet Sugarplum and Pink Pirouette for the petals and the flower centres coloured with Daffodil Delight and Delightful Dijon with the leaves cut from Pear Pizzazz cardstock.  Some Black Metallic Thread was added behind the circle and some Fancy Frost Sequins added to finish.


You can get all the supplies you need for this project from me.

You can place an order online and join in the fun with the On-line Club or Contact Me and place an order.

Thank you for visiting.

Carolyn

Wednesday, 30 November 2016

Sending Smiles Across the Miles

Hi everyone, as promised another card using the new stamp set 'Lift Me Up' and the coordinating 'Up & Away' Thinlits.


I have been a bit tardy in sending some birthday cards recently so I have made this one to send to a special friend.  I love the sentiment 'Sending Smiles Across the Miles' and I thought it was perfect for a belated birthday card.

I created the scene with sponging the sky in Soft Sky (Note: the Thinlits have a large cloud image that is just the thing for sponging around to create the clouds in the sky).  The hills I made by creating a template from a piece of scrap paper as a mask and then sponging Smoky Slate.  The pine trees are from the long lasting stamp set 'Lovely as a Tree", I stamped the trees in Pear Pizzazz, Garden Green and Always Artichoke.


Don't forget the inside of the card.  I stampe the clouds using Soft Sky in the bottom corner and created a couple of extra balloons to add over the clouds.

Thank you for visiting.

Carolyn

Tuesday, 29 November 2016

Up & Away

Hi everyone, sharing a sneak peak at the new stamp set 'Lift Me Up' and the coordinating Thinlits 'Up & Away'.  I was so excited when I first saw this stamp set and thinlits showcased by Shannon West at the OnStage Live event in Brisbane.

For my card today I cased Shannon as I love the layout and colour scheme used.  I have another card coming tomorrow using the same stamp set and thinlits.


You will be able to order these products from me on 4 January 2017 when the new Occasions Catalogue is launched.

Thank you for visiting.

Carolyn

Friday, 18 November 2016

Another Christmas Card

Hi everyone, sharing a Christmas Card using the This Christmas Specialty Designer Series Paper, Peaceful Pines and stamp set and the coordinating Perfect Pines Framelits.


I had used this Designer Series Paper pack in my Christmas in July class and had several sheets of my least favourite pattern left (this usually happens to me, I use all the sheets of paper that I really like and leave the others in the pack).  I designed this card for a fundraiser to support my workplace Cancer Council Relay for Life Team.

I used this card along with the four cards in the Christmas in July class and packaged them up to sell in sets of 5.  I got 43 requests for packs so I have had to make 215 Christmas Cards (needless to say it has taken me a few weeks). It has been worth it raising $344 for the team.

Thank you for visiting.

Carolyn

Wednesday, 16 November 2016

Dragonfly Dreams

Hi everyone, I was a bit excited when I got home from work today and found my Product Purchase Premiere Stampin' Up! order on my doorstep.  Naturally I had to have a little play.


I have used a new stamp set 'Dragonfly Dreams' and the matching 'Detailed Dragonfly Thinlits' available in the Occasions Catalogue from 4 January 2017.

I stamped the 1st Dragonfly image with Basic Black Archival ink and then stamped the 2nd image using Pacific Point and Bermuda Bay ink and the rock-n-roll technique.  The background on the square Shaped Framelit was stamped using the dot image stamp and Soft Sky ink.  The card base is Bermuda Bay and the sentiment from the same stamp set is stamp using Basic Black Archival ink.

You can get the supplies to make this card from me come 4 January 2017 when the new Occasions Catalogue is available.

Thank you for visiting.

Carolyn

Tuesday, 15 November 2016

Embossed Foil

Hi everyone, in late October I attended a Stamp Camp held by a good friend of mine where I was shown how to do this technique of embossing foil and adding Copper & Gold Embossing Powder along with some Black Stazon ink.


I have used a Kraft card base with a piece of Basic Black cardstock layered on top.  A little Copper Embossing was added to the background of the card, with a silver doily and some silver stars added in keeping with the metallic theme.  

You can get all the supplies you need for this project from me.

You can place an order online and join in the fun with the On-line Club or Contact Me and place an order.

Thank you for visiting.

Carolyn

Sunday, 13 November 2016

Pop of Pink

Hi Everyone, I attended the OnStage Live event in Brisbane last week where the new products in the new Occasions Catalogue coming on 4 January 2017 were unvailed.  There are some amazing goodies coming our way in the New Year.

As part of the event you get the opportunity (if you wish) to swap cards or projects with other Demonstrators.  This is one of the swaps that I made using the Pop of Pink Designer Series Paper.  


The stamp sets used are Crazy About You and Circle of Spring. The flower was made using the Flower Medallion, Petite Petals and 1/2" Circle Punches.

You can get all the supplies you need for this project from me.

You can place an order online and join in the fun with the On-line Club or Contact Me and place an order.


Thank you for visiting.

Carolyn
Friday, 11 November 2016

Birthday Bright Sneak Peak

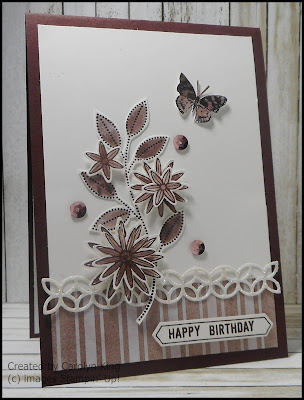
Hi everyone, just a little sneak peak at the Stamp Set "Birthday Bright" from the new 2017 Occasions Catalogue available on 4 January 2017.  I was lucky enough to win this stamp set in a Prize Patrol at the OnStage Live event I attended in Brisbane last week.


I stamped the Happy Birthday in Dapper Denim (my camera does not get this colour correct in the photo) on Whisper White and then fussy cut the words.  These were adhered to the card front using dimensionals.

The flowers are from the Garden in Bloom stamp set.  I stamped these in Dapper Denim using 1st, 2nd and 3rd generation stamping to get the various shades.   These were also fussy cut along with the leaves that were stamped using Always Artichoke.

You can get all the supplies you need for this project from me.

You can place an order online and join in the fun with the On-line Club or Contact Me and place an order.

Thank you for visiting.

Carolyn

Wednesday, 26 October 2016

Frosted Vellum

Hi Everyone, I am sharing a card I cased from Tami White on the Frosted Vellum technique.  I just love this card, so I had to make it and share it with you.  Tami has a great video tutorial on how to do this technique that you can find here.


Someone special will be getting this card for Christmas this year.

Thank you for visiting.

Carolyn

Monday, 24 October 2016

Emerging Colour

Hi everyone, sharing a technique with you today called "Emerging Colour".   I have done my card in browns and blues as the ladies who attend my card classes wanted something for the "Guys", but it also looks really great in bright colours with a darker colour such as Elegant Eggplant for Basic Black over the top.


I used Tip Top Taupe and Sahara Sand as the colours to emerge, with Night of Navy ink over the top.   The stamp set is Painter's Palette.

Technique


Stamp the smaller paint strip stamp image in Sahara Sand and Tip Top Taupe onto a 9.5cm x 13.8cm piece of White cardstock. Stamp the dots stamp image in Sahara Sand onto the same White cardstock piece. Make sure it is dry before next step.

Stamp the larger paint strip stamp image in Versamark over the stamped piece checking placement each time to get an even spread. (You can see where you have stamped previously by holding it towards a light source – it will be a little shiny).

Cover the whole piece with Clear embossing powder and then heat set with a heat gun ensuring all the embossing powder has melted.

Using a sponge or brayer add Night of Navy ink all over the piece. Wipe off all the excess ink from the embossed areas with a tissue revealing the previously stamped images.

Cut a piece on the diagonal from the Emerging Colour piece you just created (You will have left over to make another card). Adhere this to the bottom of a 9.5cm x 13.8cm piece of Whisper White cardstock. Add a strip each of the 0.5cm wide pieces of Tip Top Taupe, Sahara Sand and Night of Navy cardstock on the diagonal just above the Emerging Colour piece.

Stamp the easel image using Night of Navy ink onto a 10cm x 7cm piece of Whisper White cardstock. Hand cut out.

Stamp the sentiment using Tip Top Taupe ink onto a 5.5cm x 5.5cm piece of Whisper White cardstock. Cut out using one of the small scalloped edge squares from the Layering Squares Framelits. Adhere this to the easel. Adhere the easel to the card front using dimensionals.

Adhere the piece to the card front and add three blue sequin stars to finish.


I decorated one of the white gift boxes available in the current Holiday Catalogue to go along with the card.  The sentiment is from the Confetti Celebrations stamp set coloured with Stampin' Write Markers.

You can get all the supplies you need for this project from me.

You can place an order online and join in the fun with the On-line Club or Contact Me and place an order.

Thank you for visiting.

Carolyn

Saturday, 22 October 2016

A little Thank You

Hi everyone, I another quick and simple card using the same sketch from last week.  


The floral arrangement is from the Number of Years stamp set, stamped with Cucumber Crush, Melon Mambo, Tempting Turquoise and Blushing Bride ink.  I fussy cut around the outside of the image before layering it onto my card front.

The Tempting Turquoise designer series paper is from the Brights paper stack and the sentiment is from the Thoughtful Banners stamp set, this was White heat embossed and punched out using the Duet Banner punch.

A few Melon Mambo enamel dots and a piece of Basic Black Bakers Twine were added to finish.

You can get all the supplies you need for this project from me.

You can place an order online and join in the fun with the On-line Club or Contact Me and place an order.


Thank you for visiting.

Carolyn

Thursday, 20 October 2016

A little bit of Chocolate Chip...

Hi everyone, I have been playing with the Irresistibly Floral Specialty Designer Series Paper.  You know sometimes when you have an idea but not the right piece of paper to make your project. This paper is perfect for this, you just need to add the ink or inks of your choice.


This is another card made using the Grateful Bunch stamp set and the coordinating Blossom Bunch punch.   I have gone with a monochromatic look for my card using Chocolate Chip as my colour of choice.  The leaves and flowers have been created using the stamp set, with the leaves being fussy cut out.  They were both coloured using the Clear Wink of Stella pen and the Chocolate Chip ink.

The sentiment is from the Thoughtful Banners stamp set, punched out using the Classic Label punch.

You can get all the supplies you need for this project from me.

You can place an order online and join in the fun with the On-line Club or Contact Me and place an order.


Thank you for visiting.

Carolyn

Tuesday, 18 October 2016

Country Livin'

Hi everyone, for today's card I am using some of my left overs from previous projects.  I seem to end up with all these little bits and bobs, especially if I am demonstrating various items for card classes.


The stars were cut using the Stars Framelits and Dazzling Diamonds Glimmer Paper.  I then coloured them with Stampin' Write Markers Delightful Dijon, Early Espresso and Crumb Cake. 

The strip of patterned paper is from the Morroccan Designer Series Paper pack with the background stamped using Delightful Dijon ink and the Ghoulish Grunge stamp set and Early Espresso ink and the Timeless Texture stamp set.  The sentiment was made using the Labeler Alphabet stamp set.

You can get all the supplies you need for this project from me.

You can place an order online and join in the fun with the On-line Club or Contact Me and place an order.


Thank you for visiting.

Carolyn

Sunday, 16 October 2016

Bright and Beautiful Bunch

Hi everyone, a clean and simple layout today.  


The Melon Mambo striped background paper is from the Brights Designer Series Paper Stack.  The leaves from the Grateful Bunch stamp set were stamped with Cucumber Crush and then fussy cut out.  The flowers were made using Melon Mambo ink and the Clear Wink of Stella pen and the Blossom Bunch punch.  The butterfly was stamped with Stazon Black ink and coloured with Melon Mambo ink and Clear Wink of Stella pen, again fussy cut out.

The sentiment is from the Thoughtful Banners stamp set punched out using the Classic Label punch.


You can get all the supplies you need for this project from me.

You can place an order online and join in the fun with the On-line Club or Contact Me and place an order.

Thank you for visiting.

Carolyn

Friday, 14 October 2016

Cupcake Anyone?

Hi everyone, a quick and easy card today using the fabulous Sweet Cupcake stamp set and the coordinating Cupcake Cutout Framelits dies.  The best bit is that you get a 10% discount if you purchase these together in the Bundle, cost is $73.75 AUD.


This is a three step stamping process for the cupcake and also the wrapper.  I stamped first with Blushing Bride, then Flirty Flamingo and finished with Watermelon Wonder.  A little Clear Wink of Stella was added to the Watermelon Wonder inked areas to give a little shimmer.  The wrapper was stamped with Crumb Cake, Soft Suede and then Early Espresso.

The background White piece is from the Fancy Frost Specialty Designer Series Paper.  I decided to leave it in the raw state as I liked the contrast with the piece of spotted Blushing Bride Designer Series Paper from the Subtles Paper Stack.  The card base is Watermelon Wonder and piece of the Watermelon Wonder Mini Striped Ribbon was added to finish off.

The sentiment is also from the Sweet Cupcake stamp set.

You can get all the supplies you need for this project from me.

You can place an order online and join in the fun with the On-line Club or Contact Me and place an order.

Thank you for visiting.

Carolyn

Wednesday, 12 October 2016

Grateful Bunch

Hi everyone, just an update why I have not been regularly posting to my blog the last 2 months.  My Mum was admitted to hospital 9 weeks ago and has been diagnosed with Dementia which means that she has to go into care. We are now just doing the copious amounts of paperwork to get her situated in a good nursing home.

My creativity has taken a bit of a dive lately, but I had a little time to play with the Grateful Bunch stamp set and Blossom Bunch punch.


The card base is Kraft card stock with the Irresistibly Floral Specialty Designer Series Paper sponged with Smoky Slate as the focal background.  

The leaves were stamped and coloured with Always Artichoke ink and the Clear Wink of Stella pen.    I then fussy cut the leaves and arranged then behind the flowers which were made using Daffodil Delight ink and the Clear Wink of Stella pen.   These were punched out using the Blossoms Bunch punch and then layered together to make the flowers.  A small basic black dot was put in the centre of the flowers (these were made using the 1/8" Handheld Circle punch).

The sentiment is from the Thoughtful Banners stamp set and Classic Label punch.

You can get all the supplies you need for this project from me.

You can place an order online and join in the fun with the On-line Club or
 Contact Me and place an order.


Thank you for visiting.

Carolyn