Showing posts with label Gorgeous Grunge. Show all posts

Friday, 5 May 2017

Faux Watercolouring

Hi everyone, a quick a simple technique that I am calling 'Faux Watercolouring'.  I did not invent this great technique but I cannot remember where I found it, so sorry but whomever you are thank you for sharing your wonderful technique.  I have used this same techinque on my One Sheet Wonder series of cards.


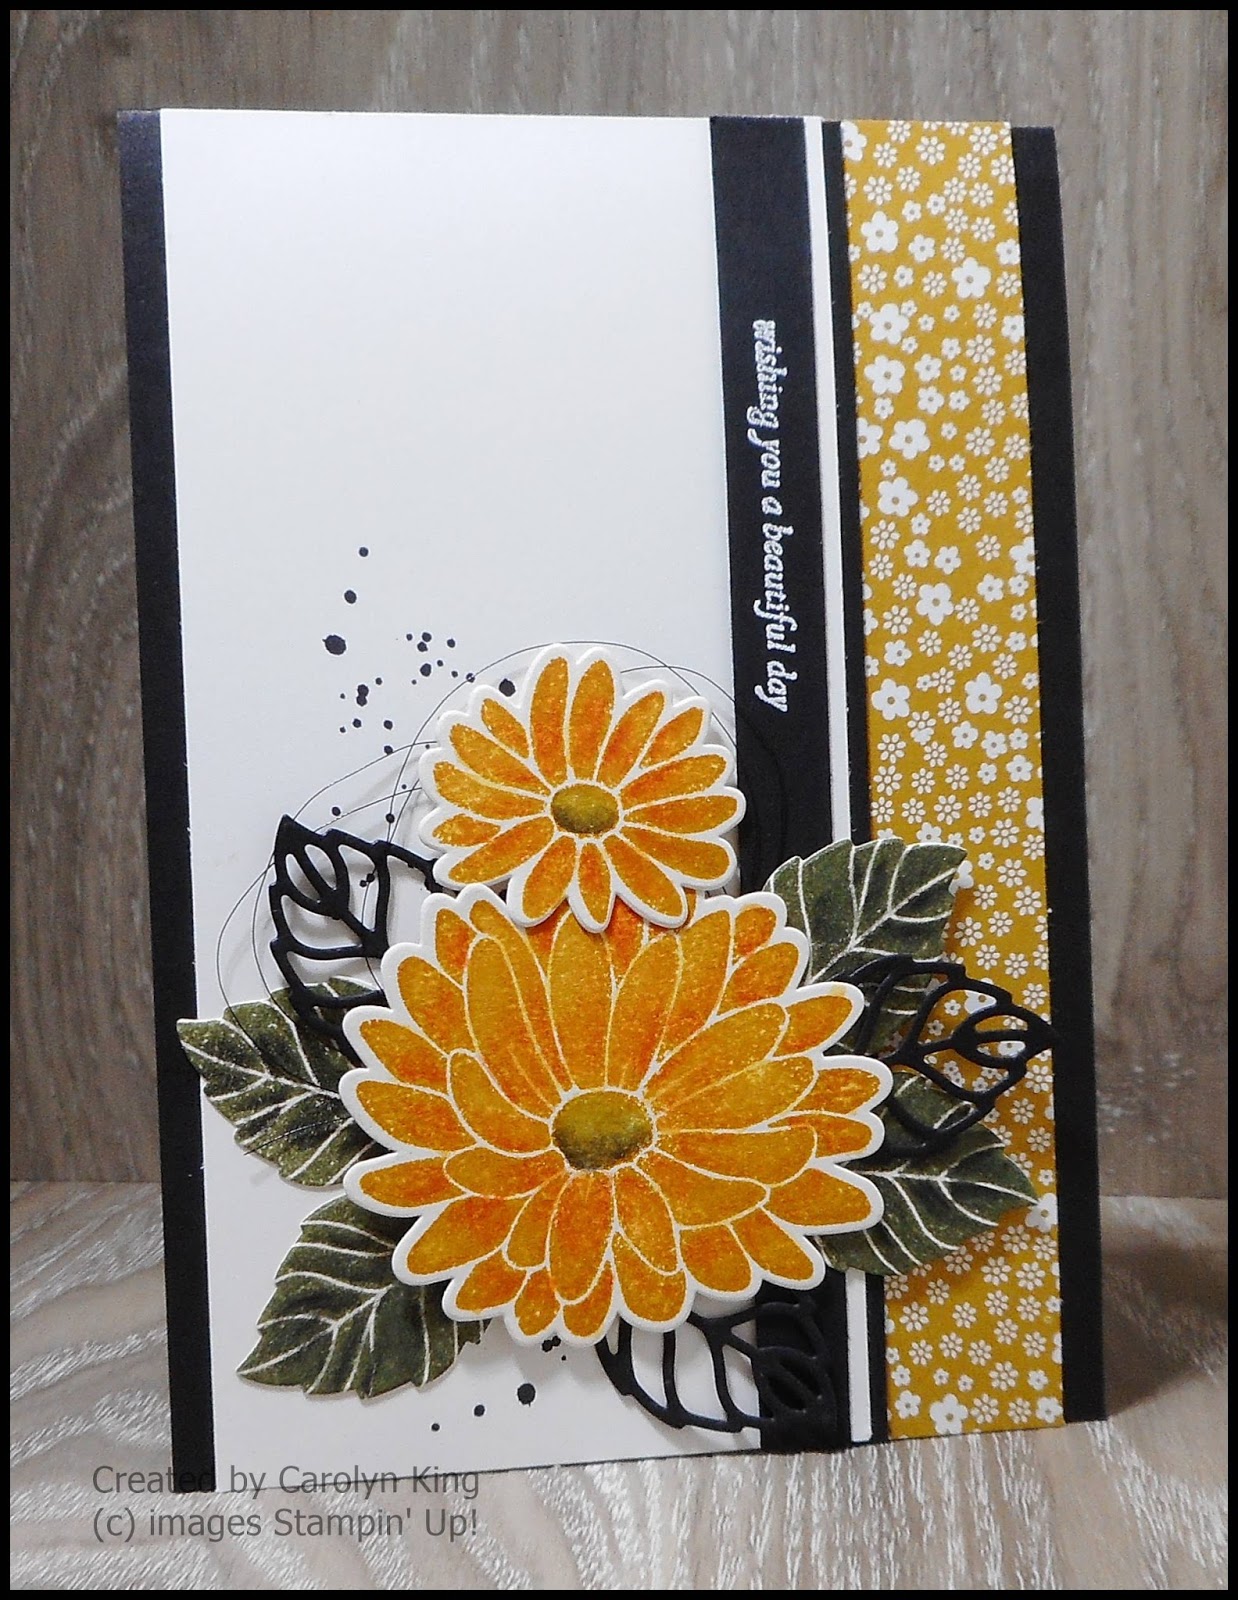
Using Shimmery White cardstock stamp and colour the flower and leaves.  I used Calypso Coral for the stamped flower with Rich Razzleberry Watercoloour Pencil and Always Artichoke with Basic Black Watercolour Pencil for the leaves. Once you have finished applying the Watercolour Pencil blend the colour using an Aquapainter. Cut them out using the Stylish Stems die cuts. The additional foliage and leaves were cut out using the Flourish Thinlits.


The Special Reason stamp set and the matching framelits are retiring at the end of May 2017 (or while stocks last). The Stylish Stems Framelits are discounted by 40% from $50.00 down to $32.40.  If you purchase the Special Reason Clear Mount stamp set for $35.00 and the Stylish Stems Framelits you will get a terrific bundle for only $67.40 AUD.


If you live in Australia 
you can get all the supplies you need

 for this project from me. 

You can place an order online and join in the fun with the On-line Club or Contact Me and place an order.


Thank you for visiting.

Carolyn

Friday, 7 April 2017

Water Colouring

Hi everyone, sharing another card I made with my water coloured flowers from the 'Birthday Blooms' stamp set.  I coloured two flowers when I was making my card for yesterday's post for the sketch challenge at Mojo Monday.


Colour scheme of Whisper White, Basic Gray and Basic Black. The Washi Tape is from the Project Life Moments Like These accessory pack.  The background dots from the 'Gorgeous Grunge' stamp set are stamped in Basic Black Archival ink.  Some Silver Metallic Thread was added and then the flower was adhere over this using dimensionals.   

The sentiment was stamped using the 'Labeler Alphabet' stamp set and then adhered onto the flower using dimensionals. Silver sequins were added to finish the card.

You can get all the supplies you need

 for this project from me. 

You can place an order online and join in the fun with the On-line Club or Contact Me and place an order.


Thank you for visiting.

Carolyn

Monday, 3 April 2017

Hello

Hi everyone, I have been creating my swaps for the On Stage Local event to be held in Perth on the 8 April.

I wanted a quick and easy designs as I was wanting to make about 20 of this design.  I will be making more swaps but of a different design.


The stamp set I used is the Flourishing Phrases.  The flower and leaves were stamped with Versamark ink and embossed with Copper Embossing Powder.  I fussy cut the flowers and leaves. You will need two flowers as the centre of one is cut out and layered onto the centre of the other one to create some dimension to the flower. 

The background was stamped with the dot image from the Gorgeous Grunge stamp set using Basic Black Archival ink.  A strip of dotted copper Washing Tape from the Affectionately Yours Designer Washi Tape Pack was added along with a Basic Black decorative strip made using the Flourish Thinlits.  This decorative strip was cut down to fit the card.

The sentiment from the Flourishing Phrases stamp set was stamped using Basic Black Archival Ink.

All the leaves and flowers were adhered to the card front using dimensionals.

For the inside of the card a piece of Basic Black cardstock cut at 14.3cm x 10cm was adhered in place.  A piece of Whisper White cardstock 13.8cm x 9.5cm with a strip of the dotted Copper Washi tape added to the bottom was then adhered to the Basic Black mat.

You can get all the supplies you need

 for this project from me. 

You can place an order online and join in the fun with the On-line Club or Contact Me and place an order.


Thank you for visiting.

Carolyn

Thursday, 9 March 2017

Special Reason - One Sheet Wonder Cards 5 & 6

Hi everyone, sharing how I made cards 5 and 6 of the Special Reason One Sheet Wonder.

Card 5


Cut a piece of A4 Delightful Dijon in half lengthwise, fold this in half to create the card base.

Cut a piece of Basic Black cardstock 9.5cm x 13.8cm, adhere this to the card front.

Cut a piece of Whisper White cardstock 9cm x 13.3cm.  Stamp the sentiment on the bottom left corner using Basic Black Archival ink. Adhere this to the card front.

Cut a piece of Designer Series Paper 8.5cm x 9.3cm.  Adhere this to the Whisper White piece on the card front.

Cut a Basic Black decorative strip using the Flourish Thinlits. Adhere this across the bottom where the Designer Series Paper meets the Whisper White cardstock.  Adhere a Lace Doily over this decorative strip (refer to the picture for placement).

Stamp and watercolour a large flower and 3 large leaves.  Cut these out using the Stylish Stems Framelits.  Arrange the flowers and leaves on the doily, refer to the picture for placement.

Add some Rhinestones to finish the card front.

For the inside cut a piece of Whisper White cardstock 10cm x 14.3cm.

Stamp and watercolour a small flower and 3 small leaves.  Cut these out using the Stylish Stems Framelits.  Arrange the flowers and leaves on the bottom right of the card inside, refer to the picture for placement.  Stamp the sentiment using Basic Black Archival ink on the bottom of the card inside near the small flower arrangement, refer to picture for placement.


Card 6


Cut a piece of A4 Delightful Dijon in half lengthwise, fold this in half to create the card base.

Cut a piece of Basic Black cardstock 9.5cm x 13.8cm, adhere this to the card front.

Cut a piece of Whisper White cardstock 9.2cm x 13.3cm. Stamp the dot image from the Gorgeous Grunge Stamp set towards the top centre, refer to the picture for placement. 

Cut a piece of Designer Series Paper 2cm x 8.5cm.  Adhere this to the Whisper White piece about halfway, refer to the picture for placement.

Cut a Basic Black decorative strip using the Flourish Thinlits.  Cut this down to size and then adhere to the Whisper White piece just at the top of the Designer Series Paper.

Stamp the sentiment just below the Designer Series Paper to the left side, making sure to leave enough room for the flower.

Stamp and watercolour a large flower and 3 large leaves.  Cut these out using the Stylish Stems Framelits.  Arrange the flowers and leaves on the doily, refer to the picture for placement.

Adhere the Whisper White piece to the card front and add some Rhinestones to finish.

For the inside cut a piece of Whisper White cardstock 10cm x 14.3cm.

Stamp and watercolour a small flower and 3 small leaves.  Cut these out using the Stylish Stems Framelits.  Arrange the flowers and leaves on the bottom right of the card inside, refer to the picture for placement.  Stamp the sentiment using Basic Black Archival ink on the bottom of the card inside near the small flower arrangement, refer to picture for placement.


You can get all the supplies you need

 for this project from me. 

You can place an order online and join in the fun with the On-line Club or Contact Me and place an order.

Don't forget Sale-A-Bration. 
 For every $90 AUD you spend you get to choose a free item
from the Sale-A-Bration catalogue.


Thank you for visiting.

Carolyn

Wednesday, 8 March 2017

Special Reason - One Sheet Wonder Cards 3 & 4

Hi everyone, sharing how I made Cards 3 & 4 of the Special Reason One Sheet Wonder.

Card 3


A5 piece of Basic Black cardstock (this is half an A4 which has been cut in half) fold this in half to create the card base.

Cut a piece of Whisper White cardstock 9.5cm x 13.8cm and adhere this to the card front.

Cut a piece of Delightful Dijon 9.2cm x 13.5cm and adhere this to the card front.

Cut a piece of Basic Black 8cm x 12.8cm and adhere this to the card front.

Cut a piece of Whisper White 7.7cm x 12.5cm.  Stamp the dot image from the Gorgeous Grunge stamp set on this piece using Basic Black Archival ink.  Adhere this to the card front.

Cut a piece of Designer Series Paper 10.5cm x 3.8cm.  Adhere this to a piece of Basic Black cardstock 10.5cm x 4.2cm.  Adhere this to the card front, using the picture as a guide.

Stamp and watercolour a large flower, a small flower and 3 large leaves.  Cut these out using the Stylish Stems Framelits.  Also cut 1 Basic Black outline flower using the Stylish Stems Framelits. Arrange the flowers and leaves as you like, refer to the picture for placement.

Stamp the sentiment on a piece of Basic Black cardstock using Versamark Ink, add White Embossing Powder and heat set.  Punch this out using the Classic Label Punch.  Adhere this onto a piece of Burlap Ribbon and then adhere this to the card front.

For the inside of the card adhere the strip of Designer Series Paper 1.5cm x 10cm to a piece of Basic Black cardstock 2cm x 10cm and adhere across the bottom of a piece of Whisper White cardstock cut at 14.3cm x 10cm.


Card 4


A5 piece of Basic Black cardstock (this is half an A4 which has been cut in half) fold this in half to create the card base.

Cut 3 pieces of Delightful Dijon cardstock 4.1cm x 9.1cm.
Cut 3 pieces of Whisper White cardstock 3.8cm x 8.8cm.
Cut 3 pieces of Designer Series Paper 3.5cm x 8.5cm.

Layer these together and the adhere the three pieces evenly across the card front.

Adhere a Lace Doily in place with some Basic Black Metallic Thread adhered to the centre.

Stamp and watercolour a large flower and 3 large leaves.  Cut these out using the Stylish Stems Framelits.  Arrange the flowers and leaves on the centre of the doily, refer to the picture for placement.

Stamp the sentiment on a piece of Basic Black cardstock using Versamark Ink, add White Embossing Powder and heat set.  Punch this out using the Classic Label Punch. 

For the inside of the card stamp and watercolour a small flower and 3 small leaves.  Cut these out using the Stylish Stems Framelits. Arrange in the bottom right corner of a piece of Whisper White cardstock.  Stamp the sentiment 'wishing you a beautiful day' on the bottom of the inside of the card near the small flower arrangement.

You can get all the supplies you need

 for this project from me. 

You can place an order online and join in the fun with the On-line Club or Contact Me and place an order.

Don't forget Sale-A-Bration. 
 For every $90 AUD you spend you get to choose a free item
from the Sale-A-Bration catalogue.


Thank you for visiting.

Carolyn

Tuesday, 7 March 2017

Special Reason - One Sheet Wonder Layout and Cards 1 & 2

Hi everyone, have you ever had an idea and it just evolved into something a bit more than what you had imagined?  This is what happened to me when I sat down at my craft table (really the kitchen table) to stamp some cards for Ronald McDonald House Charity so that I could take them along to the On Stage Local event here in Perth on 8 April.

I started out with a few card sketches and ideas to create my cards. I then thought to get the most out of my Designer Series Paper I would design a One Sheet Wonder.   I was wanting to use the Delightful Dijon floral paper in the 2015-17 In-color Designer Series Paper Stack and had worked out a colour scheme of Basic Black, Whisper White, Delightful Dijon and Always Artichoke.  

This is the cutting layout.  It is not to scale and it is in metric as this is what we use in Australia, however to convert to imperial you can use a conversion chart.


NOTE:  The dimensions for Card 9 should read 8.5cm x 12.8cm. You will have a small 0.4cm leftover piece that you will need to discard or you can add it to Card 12.  You will just need to alter the cutting plan for this card to compensate for the extra length.

So I started creating my cards and then the Gold and White striped card tin that is in the Sale-A-Bration catalogue was whispering to me from my craft cupboard where I had stashed it when it arrive a couple of weeks ago.  This is what happened.


I made 14 cards from the one sheet of 12" x 12" Designer Series Paper.  I used the stamp sets Special Reason and Gorgeous Grunge, the Stylish Stems Framelits, Flourish Thinlits and the Lovely Lace Textured Impressions Embossing Folder.


To decorate the tin I die cut a piece of Basic Black cardstock for the cut out flower (not sure how to describe this but it is just the out line of the petals).  I then stamped the large flower with Delightful Dijon and added some of the Pumpkin Pie colour from the Watercolor pencils (I will explain later in this post on how I did this).  The leaves were stamped with Always Artichoke and added some Basic Black colour from the Watercolour pencils.  These were then cut out using the Stylish Stems Framelits.  These were adhered to the tin using Ranger Glossy Accents as this was the only glue that I had on had to stick these images to the tin.  I knew that they would stay there and not come off as I used Glossy Accents.

The word "Cards" was then cut out using the Large Letters Framelits and Basic Black Cardstock.  These were also adhered using the Glossy Accents.   A Basic Black Baker's Twine bow was added to finish decorating the tin.


Over the next week I will be sharing with you how I made each card.

Card 1

I started stamping without doing any watercolouring.  The cards look okay but imagine if you added some watercolouring (I still cannot get used to the non English spelling of color it just does not seem right, colour is more like it). 

Don't know how to watercolour?  I will let you in on a little secret, neither do I.  I just go with what appeals to me, whether it is the correct technique or not.    I call this cheats watercolouring or faux watercolouring as you stamp the image, add some watercolour pencil and then blend and move the colour around with an Aquapainter.  I have posted how I did this after the card instructions for Card 1.

The card below is just the stamped images.


This is the same card but after I had done the watercolouring.  What a difference, it just makes the flowers pop.


Dimensions for this card are:

A4 piece of Basic Black cardstock cut in half lengthwise.  This is then folded in half to create the card base.

Cut a piece of Whisper White 9.5cm x 14.8cm.
Cut a piece of Designer Series Paper 2.5cm x 14.8cm
Cut a piece of Whisper White cardstock 1cm x 14.8cm
Cut 2 pieces of Basic Black cardstock 1cm x 14.8cm

Adhere the Designer Series Paper to the piece of Whisper White cardstock, lining it up on the right hand edge.  Use the picture as a guide.  Then adhere one of the Basic Black strips to edge of the Designer Series Paper and then adhere the Whisper White piece to this, leaving a small strip of Basic Black showing.

Stamp the sentiment on the other piece of Basic Black cardstock using Versamark, add White Embossing Powder and heat set. Adhere this to the Whisper White strip of cardstock leaving a small white border showing.  Using Basic Black Archival ink stamp the dot image from the Gorgeous Grunge Stamp Set on the bottom of the Whisper White piece that you have just adhered the strips to. Adhere this piece to the card front leaving a small strip of Basic Black either side.  Refer to the picture above.

Stamp and colour the flowers and leaves.  I used Delightful Dijon for the stamped flowers with Pumpkin Pie Watercolour Pencil and Always Artichoke with Basic Black Watercolour Pencil for the leaves.  Cut them out using the Stylish Stems die cuts.  Also cut out some Basic Black leaves.   Add some Basic Black Metallic Thread to the card front and arrange the leaves and flowers how you like.

For the inside of the card adhere the strip of Designer Series Paper 1.5cm x 10cm to a piece of Basic Black cardstock 2cm x 10cm and adhere across the bottom of a piece of Whisper White cardstock cut at 14.3cm x 10cm.


Watercolouring


The first picture shows the stamped images with the Watercolour pencil just coloured in at the base of the petals and also along the centre ridge of the leaves.  I used Shimmery White cardstock to stamp and watercolour all the images.  The flowers were stamped with Delightful Dijon and then Pumpkin Pie Watercolour Pencil added.  The leaves were stamped with Always Artichoke and Basic Black Watercolour Pencil added.


The second picture shows the flowers and leaves after the colour has been blended and moved around using an Aquapainter.  The difference is subtle but is leaves a terrific finish.

Card 2


A5 piece of Delightful Dijon cardstock (this is A4 cut in half) folded in half to create the card base.

Cut a piece of Basic Black cardstock 14.3cm x 10cm.  Adhere to card front.

Cut a piece of Whisper White cardstock 13.8cm x 9.5cm.  Put this through the Lovely Lace Textured Impressions Embossing folder and then adhere to the card front.

Cut a piece of 6.5cm x 12cm Basic Black cardstock.

Cut a piece of Whisper White cardstock 6cm x 11.5cm.  Stamp the dotted image from the Gorgeous Grunge stamp set using Basic Black Archival ink on this piece.  Adhere to the 6.5cm x 12cm Basic Black cardstock piece and adhere to the card front.  Use the picture above as a guide.

Cut a piece of Designer Series Paper 10.5cm x 3.8cm.  Adhere this to a piece of Basic Black cardstock 10.5cm x 4.2cm.  Adhere this to the card front, using the picture as a guide.

Stamp and watercolour a large flower, a small flower and 4 large leaves.  Cut these out using the Stylish Stems Framelits.  Also cut 3 Basic Black leaves using the Stylish Stems Framelits.  Adhere some Basic Black Metallic thread in place and then arrange the flowers and leaves as you like, refer to the picture for placement.

Stamp the sentiment on a piece of Basic Black cardstock using Versamark Ink, add White Embossing Powder and heat set.  Punch this out using the Classic Label Punch.  Adhere this onto a piece of Burlap Ribbon and then adhere this to the card front.

For the inside of the card adhere the strip of Designer Series Paper 1.5cm x 10cm to a piece of Basic Black cardstock 2cm x 10cm and adhere across the bottom of a piece of Whisper White cardstock cut at 14.3cm x 10cm.


You can get all the supplies you need

 for this project from me. 

You can place an order online and join in the fun with the On-line Club or Contact Me and place an order.

Don't forget Sale-A-Bration. 
 For every $90 AUD you spend you get to choose a free item
from the Sale-A-Bration catalogue.


Thank you for visiting.


Carolyn

Sunday, 22 January 2017

Hugs & Kisses ...

Hi everyone, I am playing along this week with the challenge at Case This Sketch.  


I have used the Sealed with Love stamp set and the matching Love Notes Framelits Dies.  The inspiration for the vintage style of the heart layout is from Kimberly Van Diepen who is one of the Stampin' Up! Artisans for 2017.  If you have not done the Artisan's Blog Hop then you are in for a treat, there is so much inspiration.

To make this card you will need a piece of A4 Thick Whisper White cardstock cut in half lengthwise then folded in half to create the card base.  Cut a piece of Basic Black cardstock 9.5cm x 13.8cm, a piece of Kraft cardstock 9cm x 13.2cm and a piece of Whisper White 8.5cm x 12.8cm.

The background was created by doing a Soft Suede watercolour wash on the 8.5cm x 12.8cm piece of Whisper White cardstock.  As you are only washing over one layer of colour the Whisper White cardstock will be okay to use for this card.  Once this is dry stamp the random dot image from the Gorgeous Grunge stamp set using Basic Black Archival ink over the watercolour washed area. Adhere the layers of the card front together, making sure to match the edges in the top left corner to create the offset of the three layers.  Adhere these layers to the card front.

Cut out a Basic Black heart and a Kraft arrow using the Love Notes Framelits dies. Using the Sweetheart punch, punch out a heart from the Music Note paper from the This Christmas Specialty Designer Series Paper pack.  Layer these over the watercolour washed area. Adhere some Linen Thread and then adhere the arrow over this.

Stamp the Hugs and Kisses sentiment on to a piece of Basic Black cardstock using Versamark ink, add White Embossing Powder and heat set.  Cut out to the desired size and adhere to the card front using dimensionals. Add three gold metallic enamel shapes to finish.

Thank you for visiting.

Carolyn

Sunday, 1 January 2017

Stampin' Up! OnStage Display Board Entry

Happy New Year Everyone, sharing some projects (some new and some old) for an entry to Stampin' Up! for the opportunity to stamp projects for the OnStage display boards for the April Event. 

I am going to the Perth Event and I am looking forward to catching up with everyone and also meeting some new faces.   I really enjoy these events as you get to see and try the new products coming our way, see new projects that people have made which are such an inspiration, training tips and tricks and one of my favourites is the swapping of projects. 

Not sure how I will fare but if you do not enter you will not be selected right, so here goes. We have to make 3 cards, 1 scrapbooking page and 2 3D items for our entry.

Cards

For my first card I have used the new Urban Underground Specialty Designer Series Paper along with the stamp set Nailed It and coordinating Build It Framelits.  The Urban Underground Embellishments added a finishing touch.


For my second card I have used the new Watercolour Pencils to colour the image from Birthday Blooms.  I coloured the image in Rich Razzleberry and Old Olive.  How amazing are these Watercolour Pencils, they make water colouring so easy.  I fussy cut the image and layered it over one of the new Lace Doilies. These doilies have a Very Vanilla side and the other side is Whisper White, so they can be used on so many projects.

The sentiment is from the Labeler Alphabet.  The background  was made by misting a piece of Whisper White with Pink Pirouette ink mixed with Isocol Rubbing Alcohol and then stamping in Archival Basic Black the random dots image from the Gorgeous Grunge stamp set.  Basic Black Metallic Thread and some Silver Metallic Enamel Shapes were added as finishing touches.


My third card is one that I had made previously.  I really like the simple classic lines of this card.  It is also a great card for a beginner stamper to do, it looks complicated but it is very easy to do.

I have used the stamp set 'Dragonfly Dreams' and the matching 'Detailed Dragonfly Thinlits'.

I stamped the 1st Dragonfly image with Basic Black Archival ink and then stamped the 2nd image using Pacific Point and Bermuda Bay ink and the rock-n-roll technique.  The background on the square Shaped Framelit was stamped using the dot image stamp and Soft Sky ink.  The card base is Bermuda Bay and the sentiment from the same stamp set is stamped using Basic Black Archival ink.


Scrapbook Page

You know when you see a stamp set and you think immediately of how you can use it.  This happened to me when I saw the Hey Chick stamp set in the Sale-A-Bration catalogue as I knew that I had these great photos of my Great Niece enjoying some time in the Baby Barnyard at a Junior Diabetes Fundraising Event.

I am still working out how to photograph my scrapbook pages.  I create the pages regularly but do not photograph them so my technique leaves a lot to be desired, so sorry for the finished picture.


3D Items

My first 3D Item is a hexagon box I made to fit 4 small cakes of soap.  I had purchased these small cakes of soap that are circle in shape and are individually wrapped so I wanted to make a small box to put them in for a thank you gift.

Using the Grid Paper (great resource this), I worked out the dimensions for the box that I would need.  This is the finished box.


The flower and leaves on top were made using the Botanical Builder Framelits.  For the flower I cut out 4 Very Vanilla flower shapes and formed them into the flower, with one of the flower shapes folded to form the centre bud.  The little tag is from the Tags & Labels Framelits with the sentiment from the Circle of Spring stamp set.


My second 3D Item is one that I am quite excited about.  I teamed the All Year Long Project Life Card Collection and the All Year Long Project Life Accessory Pack with the Urban Underground Specialty Designer Series Paper Pack and created this little file folder that holds a mini album.


The project measures 4 3/4" high by 6 1/2" high with a depth of 1".


The mini album pages measure 6" x 4 1/4".


There are four double pages going forward and three double pages on the reverse when the album is turned over.  All pages have been decorated with the Urban Underground Specialty Designer Series Paper and the All Year Long Project Life Card Collection and Accessory Pack.  Pockets and tags have been created to added more areas for photos and journaling and some dimension to the album.


Thank you for visiting.

Carolyn

Tuesday, 20 December 2016

Can You Case It?

Hi everyone, sharing my card that I made for the Can You Case It Challenge based on this sketch.
143
I have used stamp sets Thoughtful Banners, Gorgeous Grunge and Grateful Bunch along with the matching Blossom Bunch Punch.


Colour scheme of Sweet Sugarplum, Crumb Cake, Copper and Early Espresso.

I love the stitched edging around the square which was made using the Stitched Shapes Framelits, it gives the square a great finish.

The flowers and leaf images were coloured using the Wink of Stella pen and Sweet Sugarplum for the flowers and Early Espresso for the leaf and stem.  It gives a lovely shimmer to the card.

A piece of Copper Metallic Thread was added along with some sequins to finish.

Thank you for visiting.

Carolyn

Monday, 5 December 2016

Falling Flowers

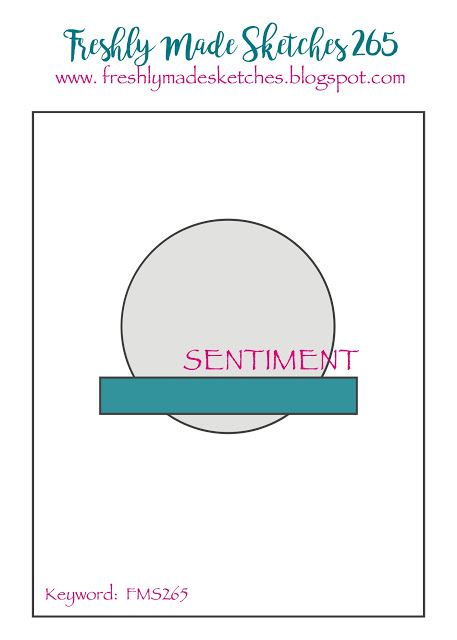
Hi everyone, I am playing along this week with Freshly Made Sketches.  

For my card I have used the Falling Flowers, Gorgeous Grunge and Teeny Tiny Sentiments stamp sets along with Layering Circles, Stitched Shapes and May Flowers Framelits dies.

The flowers were water coloured with Sweet Sugarplum and Pink Pirouette for the petals and the flower centres coloured with Daffodil Delight and Delightful Dijon with the leaves cut from Pear Pizzazz cardstock.  Some Black Metallic Thread was added behind the circle and some Fancy Frost Sequins added to finish.


You can get all the supplies you need for this project from me.

You can place an order online and join in the fun with the On-line Club or Contact Me and place an order.

Thank you for visiting.

Carolyn

Wednesday, 13 July 2016

Blue Flowers

Hi everyone, fourth project from the Type 1 Junior Diabetes Research Fundraiser. This card has a clean fresh look, I love the pop of blue with the Crumb Cake and Whisper White.


  • Create the card base by cutting a piece of A4 Crumb Cake cardstock in half lengthwise and then fold in half to create the card base.
  • Stamp the flower image three times using Pacific Point ink on the Whisper White cardstock.  Take note to stamp with the small flower to the top to make it easier to put it in the punch.
  • Using the Wink of Stella pen colour over the flowers, this will pick up some of the blue and lightly colour the petals for you.
  • Punch out using the Blossom Bunch Punch and layer some of them together using dimensionals.
  • Stamp the leaf image using Pear Pizzazz on Whisper White and hand cut, leaving a small white border. 
  • Stamp the leaf image using Pear Pizzazz on the Whisper White piece for the inside of the card.
  • Stamp the random dotted image using Crumb Cake on the Whisper White cardstock piece for the card front.  Less is more here, you only need to stamp once (twice at most).
  • Cut the square using the Layering Squares Framelits dies and the piece of Crumb Cake cardstock.  Stick this to the card front over the stamped dot area.
  • Stick the leaf image in place and add the flowers.  Add some Pacific Point sequins to finish.
  • Add the flowers to the inside of the card to finish.
Bonus Days

For every $90 you spend from 7-31 July, you will get 

a $9 bonus days coupon which you can

redeem 2-31 August.


GET ALL THE DETAILS HERE!!!

You can place an order online and join in 
the fun with the On-line Club or Contact Me and place an order.


Thank you for visiting

Carolyn