Showing posts with label Labeler Alphabet. Show all posts

Monday, 9 April 2018

Perk Up

I had a bit of fun with this card with the play on words and the coffee pot and cup pictures.  


I used the Coffee Break Designer Series Paper and the Labeler Alphabet Stamp set with a Crumb Cake card base.

If you live in Australia 
you can get all the supplies you need

 for this project from me. 

You can place an order online and join in the fun with the On-line Club or Contact Me and place an order.


Thank you for visiting.

Carolyn
 

Saturday, 30 December 2017

Altered Notebook

With all the excitement of the new Occasions Catalogue and the Sale-a-Bration promotion I sometimes forget the stamp sets and embellishments that I already have in my stash.  

I found these notebooks at Kmart for $3 AUD and had the idea to transform one of them into an Art Journal and the other into a Birthday Book.  I immediately thought of the Timeless Textures stamp set to create the background along with some Embossing Paste, ribbons and sequins.


The Art Journal is a idea that I picked up from Jennifer McGuire where you jot down any ideas that you have for cards or projects, or keep a reference of an idea that you like from a project made by someone else.  I do not know about you, but I usually forget where I have seen a great idea and have to try and find it again when I want to recreate it or something similar.   The Art Journal is perfect for keeping a record, it is also a great reference tool when you are looking for some inspiration.  Another alternative is to change the word 'ART' to 'MY' and to can create a great little gift for someone who likes to keep a journal or diary.


To create the background I took a piece of Crumb Cake cardstock 5" x 7 3/4" and dragged the White Craft Ink Pad down the cardstock piece.  I dried this with the heat gun to speed up the process.

The coffee stain image from the Timeless Textures stamp set was then stamped randomly using Archival Basic Black ink.  The fleur-de-les image was then stamped randomly using Crumb Cake ink.  The distressed edge image was stamped around the edge of the piece using Soft Suede ink.

The next layer was then added using the Pattern Party Decorative Masks and Embossing Paste.  Once this was dry the dot image from the Timeless Textures stamp set was stamped randomly with Versamark ink and Copper Embossing Powder added and heat set.  The same image was then stamped randomly with Archival Basic Black ink.


This background piece was matted onto a piece of Basic Black cardstock 5 1/4" x 8", then adhered to the front of the notebook.  Ribbons were tied down the spine, I used Copper Trim, Basic Black Shimmer, Lace Trim and Burlap (this was cut in half).

The word 'ART', using the Letters for You stamp set, was stamped in Archival Basic Black ink on Very Vanilla and cut out using the Large Letters Framelits.  The edges were inked with Crumb Cake.  This was adhere to the notebook front.

I then stamped the word 'Journal', using the Labeler Alphabet stamp set, Archival Basic Black ink and Very Vanilla cardstock.  This was trimmed to fit across a corrugated oval from the Corrugated Shapes embellishments.  A piece of Cooper Trim 10" long was teased apart and trimmed to fit behind the corrugated oval.  A button from the True Gentleman Buttons was added with a double Linen Thread bow.  Copper sequins from the Metallic Sequin Assortment were added to finish.


For the Birthday Book I made the background the same and the ribbons on the spine.  

The word 'BOOK', using the Letters for You stamp set, was stamped in Archival Basic Black ink on Very Vanilla and cut out using the Large Letters Framelits.  The edges were inked with Crumb Cake.  This was adhere to the notebook front.

The word 'Birthday' was made using the Happy Birthday Thinlits and Basic Black cardstock.  This was adhered to the notebook front.  Copper sequins from the Metallic Sequin Assortment were added to finish.

For the inside I divided the book into 12 equal parts and made tabs for each month using the Tabs for Everything and the Labeler Alphabe stamp sets and the Circle Tab punch.


If you live in Australia 
you can get all the supplies you need

 for this project from me. 

You can place an order online and join in the fun with the On-line Club or Contact Me and place an order.


Thank you for visiting.

Carolyn
 

Sunday, 24 December 2017

I'd Slay A Dragon for You

A bit of a whimsical card today, made using the new Myths and Magic Specialty Designer Series Paper and Magical Day stamp set available 2 January 2018 in the Occasions Catalogue.  I also used the Labeler Alphabet stamp set to create the words "I'd Slay a Dragon for You".


The paper has all these knights, dragons, castles, mermaids, wizards and other images that you can fussy cut. 

Or if you prefer the Magical Day stamp set has all the same images that you can colour with Stampin' Blends, or Watercolour Pencils, or ink and an Aquapainter.  You can then cut these out using the matching Magical Mates Framelits dies.


If you live in Australia 
you can get all the supplies you need

 for this project from me. 

You can place an order online and join in the fun with the On-line Club or Contact Me and place an order.


Thank you for visiting.

Carolyn
 

Friday, 18 August 2017

Wood Textures Designer Series Paper

After creating the two cards in the previous post using the Wood Textures Designer Series Paper and the Oh So Eclectic Stamp Set and the Eclectic Layers Thinlits, I got to thinking about how else to use the Wood Textures Designer Series Paper.

My creative mojo has been on a bit of a hiatus lately so I have given my self a little challenge to see what I can create.  I have selected one each of the 12 patterns in the pack, and after making the first set of cards I realised that you can get a lot of cards from the one paper pack as there are 48 sheets in total, 4 each of the 12 designs.


This set of cards uses the piece of pattern paper with all the logs on it.  I will admit that when I first started using this paper, I thought what am I going to make with this.  I got my inspiration of Paula Dobson who is one of the Artisan Design Team.  I love the colour combination on Paula's card and this is what I have used on my designs.  You can see Paula's card here.

Card 1


To make this card you need to the following pieces:

Template made from a piece of Very Vanilla Cardstock 8cm x 14.8cm.  Cut the bottom corners off, measure 4cm up each side and then cut on the diagonal.  You will get a better look if the point of the bottom of the template is not centred, eg offset to oneside.

Measurements

A4 Thick Very Vanilla cardstock cut in half to create the card base
A piece of Very Vanilla cardstock 8cm x 14.8cm (put the template on this piece and draw the diagonal and then cut off the corners)
A piece of Basic Black cardstock 8.3cm x 14.8cm (put the template on this piece making sure to line up the template to the bottom edge, draw the diagonal from the them plate and then cut off the corners)
A piece of Wood Textures DSP 14.8cm x 7cm
Scraps of Very Vanilla and Basic Black cardstock 

Technique

Fold card base.

Emboss the Very Vanilla piece with the 'Oh My Stars' Textured Impressions Embossing folder and the Bigshot.  Layer this piece on the Basic Black mat.

Adhere the Wood Textures DSP to the bottom of the card front and then adhere the embossed Very Vanilla with the Basic Black mat to the top of the card front.

Stamp the large leaf from the Colorful Seasons Stamp Set in Crumb Cake on Very Vanilla cardstock and then stamp the large leaf lined image on top of this using Early Espresso.  Cut out using the Seasonal Layers Thinlits.

Stamp the small leaf from the Colourful Seasons Stamp Set in Crumb Cake on Very Vanilla cardstock and then cut out using the Seasonal Layers Thinlits.

Cut out a lined leaf image using Basic Black cardstock and the die from the Seaonal Layers Thinlits.

Layer the leaf pieces together and adhere to the card front.  Add a Linen Thread bow.

Cut the word 'Happy' using the Happy Birthday Thinlits and Basic Black cardstock.  Stamp the sentiment 'Birthday' using the Labeler Alphabet stamp set, Basic Black Archival Ink on Very Vanilla cardstock.  Adhere these to the card front.

For the inside of the card you can stamp and cut out extra leaf images.

Card 2


To make this card you need to the following pieces:

Measurements

A4 Thick Very Vanilla cardstock cut in half lengthwise to create the card base
Wood Textures Designer Series Paper 14.8cm x 4.1cm
Basic Black cardstock 14.8cm x 1cm

Very Vanilla cardstock 14.8cm x 7cm
Scraps of Very Vanilla and Basic Black cardstock

Technique

Fold card base.

Emboss the Very Vanilla cardstock piece 14.8cm x 7cm using the 'Oh My Stars' Textured Impressions Embossing Folder and the Bigshot.

Adhere the piece of Wood Textures DSP to the card front.  Adhere the embossed piece of Very Vanilla cardstock to the strip of Basic Black cardstock and adhere this to the card front.

Stamp the large leaf from the Colorful Seasons Stamp Set in Crumb Cake on Very Vanilla cardstock and then stamp the large leaf lined image on top of this using Early Espresso.  Cut out using the Seasonal Layers Thinlits.

Stamp the small leaf from the Colourful Seasons Stamp Set in Crumb Cake on Very Vanilla cardstock and then cut out using the Seasonal Layers Thinlits.

Cut out a lined leaf image using Basic Black cardstock and the die from the Seaonal Layers Thinlits.

Layer the leaf pieces together and adhere to the card front.  Add a Linen Thread bow.

Cut the word 'Happy' using the Happy Birthday Thinlits and Basic Black cardstock.  Stamp the sentiment 'Birthday' using the Labeler Alphabet stamp set, Basic Black Archival Ink on Very Vanilla cardstock.  Adhere these to the card front.  

Add some sequins to finish.

For the inside of the card you can stamp and cut out extra leaf images.

Card 3


To make this card you need to the following pieces:

Measurements

A4 Thick Very Vanilla cardstock cut in half lengthwise to create the card base
Wood Textures Designer Series Paper 10.5cm x 4.1cm
Basic Black cardstock 10.5cm x 1cm
Very Vanilla cardstock 10.5cm x 11cm
Scraps of Very Vanilla and Basic Black cardstock

Technique

Fold card base.

Emboss the Very Vanilla cardstock piece 10.5cm x 11cm using the 'Oh My Stars' Textured Impressions Embossing Folder and the Bigshot.

Adhere the piece of Wood Textures DSP to the card front.  Adhere the embossed piece of Very Vanilla cardstock to the strip of Basic Black cardstock and adhere this to the card front.

Stamp the large leaf from the Colorful Seasons Stamp Set in Crumb Cake on Very Vanilla cardstock and then stamp the large leaf lined image on top of this using Early Espresso.  Cut out using the Seasonal Layers Thinlits.

Stamp the small leaf from the Colourful Seasons Stamp Set in Crumb Cake on Very Vanilla cardstock and then cut out using the Seasonal Layers Thinlits.

Cut out a lined leaf image using Basic Black cardstock and the die from the Seaonal Layers Thinlits.

Layer the leaf pieces together and adhere to the card front.  Add a Linen Thread bow.

Cut the word 'Birthday' using the Happy Birthday Thinlits and Basic Black cardstock.  Stamp the sentiment 'Happy' using the Labeler Alphabet stamp set, Basic Black Archival Ink on Very Vanilla cardstock.  Adhere these to the card front.  

Add some sequins to finish.

For the inside of the card you can stamp and cut out extra leaf images.

If you live in Australia 
you can get all the supplies you need

 for this project from me. 

You can place an order online and join in the fun with the On-line Club or Contact Me and place an order.


Thank you for visiting.

Carolyn

Thursday, 8 June 2017

Ink Swiping Technique

I was absolutely amazed when I watch the video on this great ink swiping technique by Kim Jolley.  Watch Kim's video and you will see how easy this technique is. I thought that the technique would be a bit messy but this is not the case, so try it out and have some fun.  Kim has several card samples on her blog for you to enjoy.

I have used a colour scheme of Cherry Cobbler, Smoky Slate and Black (I used Momento Ink).


The word Birthday is from the Happy Birthday Thinlits, this has been cut from Copper Foil Sheet and was left over from a previous project. Don't you just love using up left overs?  The word Happy was stamped on a thin scrap of Whisper White using the Labeler Alphabet stamp set.

This is a quick and simple card to make and would make a great make and take or stamp a stack card.

If you live in Australia 
you can get all the supplies you need

 for this project from me . 

You can place an order online and join in the fun with the On-line Club or Contact Me and place an order.


Thank you for visiting.

Carolyn

Wednesday, 26 April 2017

Butterfly Basics

He everyone, a bit of a vintage look to the colour scheme on my card today.  I have used Calypso Coral, Basic Black, Whisper White and Always Artichoke.


The stamp sets used are 'Butterfly Basics' and 'Labeler Alphabet'. The back ground foliage was stamped 1st and 2nd generation with Always Artichoke on a piece of Whisper White.  The flower was stamped with Basic Black on a piece of Shimmery White and coloured with Calypso Coral and Always Artichoke using an Aqua Painter.  I fussy cut the image out before adhering it over the stamped foliage.

The ombre look Calypso Coral ribbon is from the Cupcakes and Carousels Embellishment Kit.

A few Metal Rimmed Pearls were added to finish the card.

Thank you for visiting.

Carolyn

Friday, 7 April 2017

Water Colouring

Hi everyone, sharing another card I made with my water coloured flowers from the 'Birthday Blooms' stamp set.  I coloured two flowers when I was making my card for yesterday's post for the sketch challenge at Mojo Monday.


Colour scheme of Whisper White, Basic Gray and Basic Black. The Washi Tape is from the Project Life Moments Like These accessory pack.  The background dots from the 'Gorgeous Grunge' stamp set are stamped in Basic Black Archival ink.  Some Silver Metallic Thread was added and then the flower was adhere over this using dimensionals.   

The sentiment was stamped using the 'Labeler Alphabet' stamp set and then adhered onto the flower using dimensionals. Silver sequins were added to finish the card.

You can get all the supplies you need

 for this project from me. 

You can place an order online and join in the fun with the On-line Club or Contact Me and place an order.


Thank you for visiting.

Carolyn

Sunday, 1 January 2017

Stampin' Up! OnStage Display Board Entry

Happy New Year Everyone, sharing some projects (some new and some old) for an entry to Stampin' Up! for the opportunity to stamp projects for the OnStage display boards for the April Event. 

I am going to the Perth Event and I am looking forward to catching up with everyone and also meeting some new faces.   I really enjoy these events as you get to see and try the new products coming our way, see new projects that people have made which are such an inspiration, training tips and tricks and one of my favourites is the swapping of projects. 

Not sure how I will fare but if you do not enter you will not be selected right, so here goes. We have to make 3 cards, 1 scrapbooking page and 2 3D items for our entry.

Cards

For my first card I have used the new Urban Underground Specialty Designer Series Paper along with the stamp set Nailed It and coordinating Build It Framelits.  The Urban Underground Embellishments added a finishing touch.


For my second card I have used the new Watercolour Pencils to colour the image from Birthday Blooms.  I coloured the image in Rich Razzleberry and Old Olive.  How amazing are these Watercolour Pencils, they make water colouring so easy.  I fussy cut the image and layered it over one of the new Lace Doilies. These doilies have a Very Vanilla side and the other side is Whisper White, so they can be used on so many projects.

The sentiment is from the Labeler Alphabet.  The background  was made by misting a piece of Whisper White with Pink Pirouette ink mixed with Isocol Rubbing Alcohol and then stamping in Archival Basic Black the random dots image from the Gorgeous Grunge stamp set.  Basic Black Metallic Thread and some Silver Metallic Enamel Shapes were added as finishing touches.


My third card is one that I had made previously.  I really like the simple classic lines of this card.  It is also a great card for a beginner stamper to do, it looks complicated but it is very easy to do.

I have used the stamp set 'Dragonfly Dreams' and the matching 'Detailed Dragonfly Thinlits'.

I stamped the 1st Dragonfly image with Basic Black Archival ink and then stamped the 2nd image using Pacific Point and Bermuda Bay ink and the rock-n-roll technique.  The background on the square Shaped Framelit was stamped using the dot image stamp and Soft Sky ink.  The card base is Bermuda Bay and the sentiment from the same stamp set is stamped using Basic Black Archival ink.


Scrapbook Page

You know when you see a stamp set and you think immediately of how you can use it.  This happened to me when I saw the Hey Chick stamp set in the Sale-A-Bration catalogue as I knew that I had these great photos of my Great Niece enjoying some time in the Baby Barnyard at a Junior Diabetes Fundraising Event.

I am still working out how to photograph my scrapbook pages.  I create the pages regularly but do not photograph them so my technique leaves a lot to be desired, so sorry for the finished picture.


3D Items

My first 3D Item is a hexagon box I made to fit 4 small cakes of soap.  I had purchased these small cakes of soap that are circle in shape and are individually wrapped so I wanted to make a small box to put them in for a thank you gift.

Using the Grid Paper (great resource this), I worked out the dimensions for the box that I would need.  This is the finished box.


The flower and leaves on top were made using the Botanical Builder Framelits.  For the flower I cut out 4 Very Vanilla flower shapes and formed them into the flower, with one of the flower shapes folded to form the centre bud.  The little tag is from the Tags & Labels Framelits with the sentiment from the Circle of Spring stamp set.


My second 3D Item is one that I am quite excited about.  I teamed the All Year Long Project Life Card Collection and the All Year Long Project Life Accessory Pack with the Urban Underground Specialty Designer Series Paper Pack and created this little file folder that holds a mini album.


The project measures 4 3/4" high by 6 1/2" high with a depth of 1".


The mini album pages measure 6" x 4 1/4".


There are four double pages going forward and three double pages on the reverse when the album is turned over.  All pages have been decorated with the Urban Underground Specialty Designer Series Paper and the All Year Long Project Life Card Collection and Accessory Pack.  Pockets and tags have been created to added more areas for photos and journaling and some dimension to the album.


Thank you for visiting.

Carolyn

Tuesday, 18 October 2016

Country Livin'

Hi everyone, for today's card I am using some of my left overs from previous projects.  I seem to end up with all these little bits and bobs, especially if I am demonstrating various items for card classes.


The stars were cut using the Stars Framelits and Dazzling Diamonds Glimmer Paper.  I then coloured them with Stampin' Write Markers Delightful Dijon, Early Espresso and Crumb Cake. 

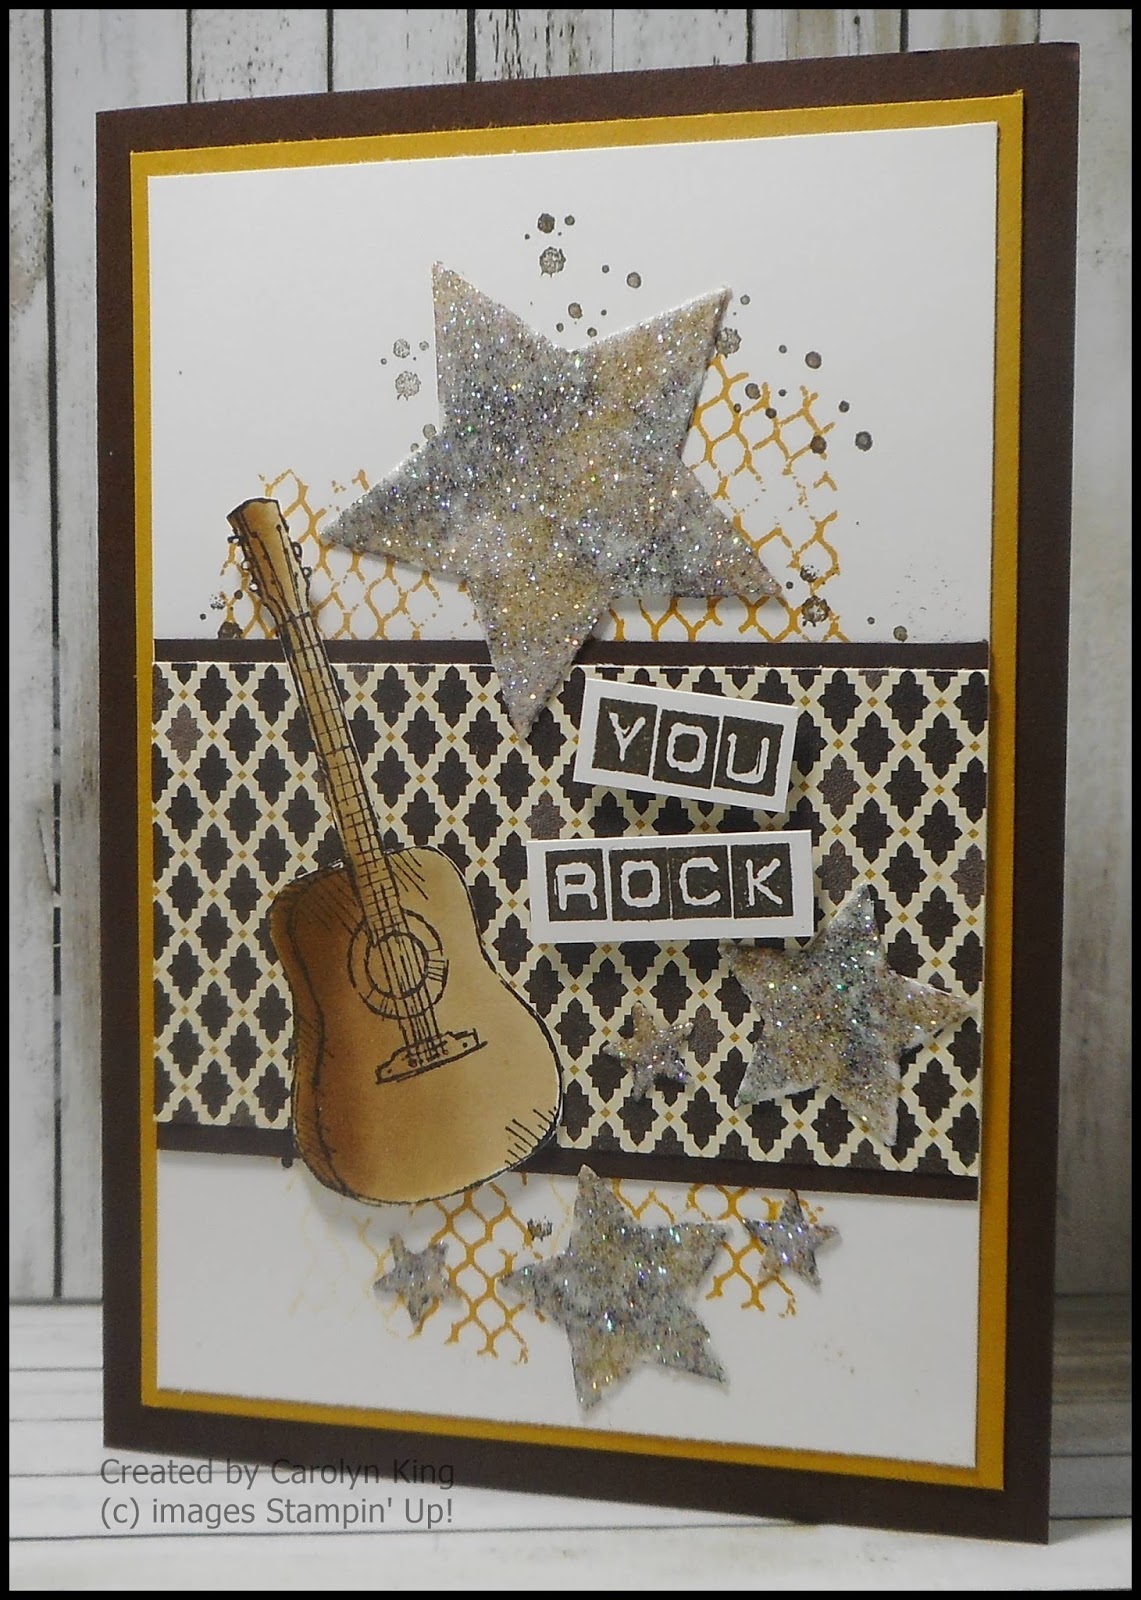
The strip of patterned paper is from the Morroccan Designer Series Paper pack with the background stamped using Delightful Dijon ink and the Ghoulish Grunge stamp set and Early Espresso ink and the Timeless Texture stamp set.  The sentiment was made using the Labeler Alphabet stamp set.

You can get all the supplies you need for this project from me.

You can place an order online and join in the fun with the On-line Club or Contact Me and place an order.


Thank you for visiting.

Carolyn

Saturday, 2 July 2016

Bella

Hi everyone, sorry for being absent the past week and not posting a project but it is the end of financial year and I have had to work some long days.  So by the time I got home from work I did not have time for creating.  I know excuses, excuses but I was so tired I could not stick anything straight.  Maybe this is why I have put the patterned paper on an angle on my card.


I have used the stamps set Labeler Alphabet for the sentiment and the cute little dog is from the Bella & Friends set.  The flowers were made using the Petite Petals stamp set and the Petite Petals Punch. 

The Layering Circles Framelits have both smooth edged and scalloped edged circles in the set.  There are 16 dies in the set with the largest die being 8.4cm x 8.4cm, just perfect for projects.

A tip that I got from OnStage Local in April is using the Best Badge punch to create a large scalloped edge which I have done on the panel behind the flowers.

The patterned paper is from the Serene Scenery Designer Series Paper Stack and the Subtles Designer Series Paper Stack.  Colour scheme is Early Espresso, Tip Top Taupe, Blushing Bride and Whisper White.

You can get all the supplies for this project from me.

You can place an order online and join in 
the fun with the On-line Club or Contact Me and place an order.


Thank you for visiting.

Carolyn

Sunday, 1 May 2016

Sneak Peak of the Labeler Alphabet

Hi everyone, at the recent On Stage Local held at Sydney I was lucky enough to receive the Labeler Alphabet stamp set as a Prize Patrol.

It is a terrific stamp set as you can create whatever word you like, either in a strip, as tiles or by punching out the stamped image with the 1/2" circle punch which you can then layer on onto a 3/4" circle.  You can also create an alphabet strip as an element for your project.

Great for scrapbooking and memory keeping as well as card making.


You will be able to order this stamp set from me on the 1 June 2016.

Thank you for visiting.

Carolyn

Saturday, 30 April 2016

Something Old, Something New and Something We Are Keeping!!

Hi everyone, did you know that you can do a resist technique with the White Stampin' Chalk Marker. I didn't until I viewed this great video tutorial by Dawn Griffiths.

Following the tutorial by Dawn I created the White Stampin' Chalk Marker resist technique on the flower.


For my card I have used the stamp sets "Timeless Textures" and "Garden in Bloom" that you can purchase now (these we are keeping) and also a new stamp set coming your way on the 1 June 2016, "Labeler Alphabet".   


The something old on the card is the Go Wild Designer Series Paper that is on the Retiring List and will no longer be available after 31 May 2016 or before depending upon stock.

See the retiring list here!
Remember if you order Online to make sure that 
you select me as your Demonstrator!!

Also if you order Online check out
the Online Club for even more benefits.

Thank you for visiting.

Carolyn.