Showing posts with label Grateful Bunch. Show all posts

Tuesday, 20 December 2016

Can You Case It?

Hi everyone, sharing my card that I made for the Can You Case It Challenge based on this sketch.
143
I have used stamp sets Thoughtful Banners, Gorgeous Grunge and Grateful Bunch along with the matching Blossom Bunch Punch.


Colour scheme of Sweet Sugarplum, Crumb Cake, Copper and Early Espresso.

I love the stitched edging around the square which was made using the Stitched Shapes Framelits, it gives the square a great finish.

The flowers and leaf images were coloured using the Wink of Stella pen and Sweet Sugarplum for the flowers and Early Espresso for the leaf and stem.  It gives a lovely shimmer to the card.

A piece of Copper Metallic Thread was added along with some sequins to finish.

Thank you for visiting.

Carolyn

Thursday, 20 October 2016

A little bit of Chocolate Chip...

Hi everyone, I have been playing with the Irresistibly Floral Specialty Designer Series Paper.  You know sometimes when you have an idea but not the right piece of paper to make your project. This paper is perfect for this, you just need to add the ink or inks of your choice.


This is another card made using the Grateful Bunch stamp set and the coordinating Blossom Bunch punch.   I have gone with a monochromatic look for my card using Chocolate Chip as my colour of choice.  The leaves and flowers have been created using the stamp set, with the leaves being fussy cut out.  They were both coloured using the Clear Wink of Stella pen and the Chocolate Chip ink.

The sentiment is from the Thoughtful Banners stamp set, punched out using the Classic Label punch.

You can get all the supplies you need for this project from me.

You can place an order online and join in the fun with the On-line Club or Contact Me and place an order.


Thank you for visiting.

Carolyn

Sunday, 16 October 2016

Bright and Beautiful Bunch

Hi everyone, a clean and simple layout today.  


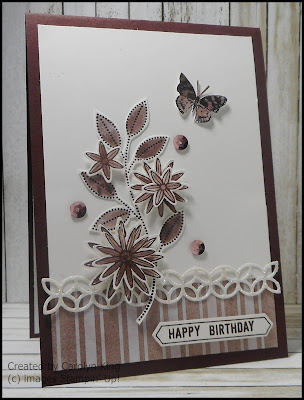
The Melon Mambo striped background paper is from the Brights Designer Series Paper Stack.  The leaves from the Grateful Bunch stamp set were stamped with Cucumber Crush and then fussy cut out.  The flowers were made using Melon Mambo ink and the Clear Wink of Stella pen and the Blossom Bunch punch.  The butterfly was stamped with Stazon Black ink and coloured with Melon Mambo ink and Clear Wink of Stella pen, again fussy cut out.

The sentiment is from the Thoughtful Banners stamp set punched out using the Classic Label punch.


You can get all the supplies you need for this project from me.

You can place an order online and join in the fun with the On-line Club or Contact Me and place an order.

Thank you for visiting.

Carolyn

Wednesday, 12 October 2016

Grateful Bunch

Hi everyone, just an update why I have not been regularly posting to my blog the last 2 months.  My Mum was admitted to hospital 9 weeks ago and has been diagnosed with Dementia which means that she has to go into care. We are now just doing the copious amounts of paperwork to get her situated in a good nursing home.

My creativity has taken a bit of a dive lately, but I had a little time to play with the Grateful Bunch stamp set and Blossom Bunch punch.


The card base is Kraft card stock with the Irresistibly Floral Specialty Designer Series Paper sponged with Smoky Slate as the focal background.  

The leaves were stamped and coloured with Always Artichoke ink and the Clear Wink of Stella pen.    I then fussy cut the leaves and arranged then behind the flowers which were made using Daffodil Delight ink and the Clear Wink of Stella pen.   These were punched out using the Blossoms Bunch punch and then layered together to make the flowers.  A small basic black dot was put in the centre of the flowers (these were made using the 1/8" Handheld Circle punch).

The sentiment is from the Thoughtful Banners stamp set and Classic Label punch.

You can get all the supplies you need for this project from me.

You can place an order online and join in the fun with the On-line Club or
 Contact Me and place an order.


Thank you for visiting.

Carolyn


Wednesday, 13 July 2016

Blue Flowers

Hi everyone, fourth project from the Type 1 Junior Diabetes Research Fundraiser. This card has a clean fresh look, I love the pop of blue with the Crumb Cake and Whisper White.


  • Create the card base by cutting a piece of A4 Crumb Cake cardstock in half lengthwise and then fold in half to create the card base.
  • Stamp the flower image three times using Pacific Point ink on the Whisper White cardstock.  Take note to stamp with the small flower to the top to make it easier to put it in the punch.
  • Using the Wink of Stella pen colour over the flowers, this will pick up some of the blue and lightly colour the petals for you.
  • Punch out using the Blossom Bunch Punch and layer some of them together using dimensionals.
  • Stamp the leaf image using Pear Pizzazz on Whisper White and hand cut, leaving a small white border. 
  • Stamp the leaf image using Pear Pizzazz on the Whisper White piece for the inside of the card.
  • Stamp the random dotted image using Crumb Cake on the Whisper White cardstock piece for the card front.  Less is more here, you only need to stamp once (twice at most).
  • Cut the square using the Layering Squares Framelits dies and the piece of Crumb Cake cardstock.  Stick this to the card front over the stamped dot area.
  • Stick the leaf image in place and add the flowers.  Add some Pacific Point sequins to finish.
  • Add the flowers to the inside of the card to finish.
Bonus Days

For every $90 you spend from 7-31 July, you will get 

a $9 bonus days coupon which you can

redeem 2-31 August.


GET ALL THE DETAILS HERE!!!

You can place an order online and join in 
the fun with the On-line Club or Contact Me and place an order.


Thank you for visiting

Carolyn


Thursday, 9 June 2016

A Touch of Copper

Hi everyone, technique card today using waxed lunch wrap.  This Waxed Resist technique is fun to do with an embossing folder, waxed lunch wrap, Bigshot, iron, Whisper White cardstock, ink and a sponge.

I had forgotten all about this technique, but at a recent Stamp Camp we made a card using this technique.  This is a card that I have designed for my June Class.


Cut a piece of waxed lunch wrap a little larger than your card front. Put this in the embossing folder of your choice, I used "Lovely Lace", and run it through the Bigshot.  Carefully remove the embossed wax lunch wrap and sandwich between two pieces of Whisper White cardstock cut to size for your card front.  Sandwich this between copy paper and using a hot iron (without steam) iron over the sandwich that you have just created until the wax has melted and transferred to the cardstock.  You will get a positive piece and a negative piece of waxed Whisper White, so you can make two cards or keep a piece for later use.  Sponge ink of your choice over the Whisper White cardstock and the design will appear resisting the ink where the wax has transferred.  I used Crumb Cake on my card. 


I heat embossed Copper on Whisper White for the flowers from the "Grateful Bunch" stamp set and then coloured them using Peekaboo Peach ink and the Wink of Stella pen.  The matching "Blossom Bunch" punch was used to cut them out.

The stem was heat embossed with Copper on Early Espresso cardstock and fussy cut out.  The sentiment from the "Crazy About You" stamp set was also heat embossed with Copper on Early Espresso cardstock and hand cut out.   The card base is Crumb Cake with a mat of Peekaboo Peach.


You can get all your supplies for this project from me.

You can place an order online and join in 
the fun with the On-line Club or Contact Me and place an order.


Thank you for visiting

Carolyn

Friday, 20 May 2016

A Small Gift ...

Hi everyone, I have been playing this week with the Grateful Bunch stamp set and the matching Blossoms punch.

I like to have a few little gifts on hand for when you get an unexpected invitation or would like to give someone a small thank you gift.  With this in mind I made a set of 4 cards and holder to keep them it.  The holder holds the 4 cards plus 4 envelopes.


The front cover I kept quite simple.  The images were stamped with Black Archival ink and then coloured with a Blushing Bride Stampin' Write Marker.  Wink of Stella was added over this to add a bit of sparkle.  The Designer Series Paper is from the Going Places Paper Pack


The four cards are made using the Going Places Designer Series Paper and a colour scheme of Basic Black, Sahara Sand, Very Vanilla and Blushing Bride.

The sentiments are from the Crazy About You and Tin of Cards stamp sets.

You can get all the supplies you need for this project
 by shopping with me.

  You can place an order online and join in 
the fun with the On-line Club or Contact Me and place an order.


Thank you for visiting.

Carolyn

Saturday, 14 May 2016

Celebrate with Peekaboo Peach

Hi everyone, I was lucky enough today to have some time to play with some of the new products in the new Annual Catalogue.  The colour scheme is Basic Black, Very Vanilla and Peekaboo Peach. 


The patterned paper is from the Playful Palette Designer Series Paper Stack.  This pack has such bold designs and then on the reverse there is the more subtle design, they coordinate perfectly. 

The stamp sets I have used are Grateful Bunch and Thoughtful Banners.  Stampin' Up! have made life so much easier for us, they have made two punches that match the Thoughtful Banners stamp set, so you can make the sentiment for your card in quick time. How cute is the little "Celebrate" banner.  This was made using the Thoughtful Banners stamp set and the coordinating Duet Banner punch.

The base card is a Basic Black A2 size.  The Very Vanilla mat is 9cm x 13.3cm with the patterned paper pieces cut at 8.5cm x 12.8cm for the Peekaboo Peach piece and 12.8cm x 3cm for the colour dotted Black piece.  I just layered the dotted Black paper over the top of the Peekaboo Peach piece.  

The tag was created using the Scalloped Tag Topper Punch and a piece of Very Vanilla cardstock 10cm x 5cm.  Washi tape from the Playful Palette Designer Washi Tape pack was added to the top and bottom with a piece of the colour dotted Black pattern paper added as well.  A piece of Peekaboo Peach Ruched Ribbon was attached to the top of the tag using the handheld stapler.

The leaf images from the Grateful Bunch stamp set were stamped on Very Vanilla cardstock using Basic Black Archival ink, these I hand cut. The butterfly was also stamped on Very Vanilla cardstock using Basic Black Archival ink and hand cut.  A swirl was created using the Swirly Scribbles Thinlits dies (I love these) and Peekaboo Peach cardstock.  The leaves, butterfly and swirl were adhered to the tag.

The flowers were made using the new Copper Embossing Powder, Versamark ink, Very Vanilla cardstock and the Grateful Bunch stamp set. Once the Copper Embossing Powder was heat set I coloured the flowers using an Aqua Painter and Peekaboo Peach ink.  I punched these out using the Blossoms Bunch Punch. These were then added to the tag using dimensionals.

Do you like this little sneak peak?  Come and join in the fun at my Catalogue Launch to be held on Monday 6th June 2016 from 1pm to 2pm at my home.  If you would like to attend just send me an email to carolyn.king@bigpond.com with your contact details and I will advise you of the address of the event.

Thank you for visiting.

Carolyn

Thursday, 7 April 2016

Weekly Deals

Hi everyone, have you checked out the weekly deals this week. One of my favourite punches, the Blossom Bunch is part of this week's deals.

I had a little play with the 'Grateful Bunch" stamp set that coordinates with this punch and came up with two cards to give you a little inspiration.


The patterned paper is from the Birthday Bouquet Designer Series Paper Pack.


I used a colour scheme of Watermelon Wonder, Whisper White with some of the stamping done in Basic Black Archival ink.


The background was created by heat embossing the stem and leaf image with Whisper White and doing a light Watermelon Wonder water wash over the top to highlight the image.

The sentiment is from the Rose Wonder stamp set.

You can get all the supplies you need for this project
 by shopping with me.
  You can place an order online and join in 
the fun with the On-line Club or Contact Me and place an order.


Thank you for visiting.

Carolyn

Saturday, 20 February 2016

Grateful Bunch Trio

Hi everyone, do you like getting good value for your purchases? Then you should check out the Grateful Bunch Stamp Set and the Blossom Bunch Punch bundle that you can get for $57.75 plus postage and handling.

I have made a trio of cards using this bundle along with the Balloon Celebration and And Many More stamps sets which I used for the sentiments.


I have used a colour scheme of Basic Black, Sahara Sand and Whisper White for all three cards.


The background for this card was made by stamping the large flower in Archival Black ink randomly over a piece of Whisper White cardstock, colouring with the Sahara Sand Stampin' Write Marker and then going over the flowers with the Clear Wink of Stella pen.  It does not show in the picture but the flowers have a beautiful shimmer.


All the small flowers were stamped with Archival Basic Black ink, coloured with the Sahara Sand Stampin' Write Marker and then Clear Wink of Stella pen added before punching out with the Blossoms Bunch Punch.

Want to make these cards yourself?

You can get all the supplies you need by shopping with me.
  You can place an order online and join in 
the fun with the On-line Club or Contact Me and place an order.

SHOP WITH ME!

Thank you for visiting

Carolyn

Sunday, 7 February 2016

A Special Gift for Someone (or maybe for yourself)..

A class will be held on April 3 2016 at my home, from 1.00pm to 4.00pm, to make this terrific set of cards and envelopes and the matching folder to keep them in.

This is a terrific little gift idea or why not just make one for yourself.  Cost of the Class is $15.00 with all kit and product supplied.  The number of attendees is limited to 8, so book in to make sure that you do not miss out.


If you are interested please contact me.

Thank you for visiting.

Carolyn

Saturday, 6 February 2016

Blackberry Blossoms ...

Hi everyone, sharing a quick card made using the "Grateful Bunch" stamp set.  It is so quick and easy to make a pretty card using this stamp set and the matching "Blossoms Bunch" punch.


I stamped the three flowers in Blackberry Bliss ink and then applied the Clear Wink of Stella Pen. The colour from the centre of the flowers is picked up on the pen and you end up lightly colouring the petals.  The beautiful glimmer from the pen does not show up in the photo but is creates a lovely finish to the flowers.

Note:  The colour from the ink does not damage the Wink of Stella Pen, you just need to run it back and forth on a piece of scrap paper to clear the colour off the tip of the pen.

Thank you for visiting.

Carolyn

Friday, 22 January 2016

A Little Gift of Cards ...

I am sharing a project with you today that a learnt how to make at a Stamp Camp that I attended last September.   I have remade the project using some of the latest stamps and framelits, it is a card holder for 4 cards made using the Whisper White Note Cards and Envelopes.

Does it look familiar, it should I cased myself from a card I recently posted here.


The stamp sets used on my project are Writing Notes, Timeless Textures, Grateful Bunch, Crazy About You, And Many More and Picture Perfect.  Colour scheme of Tip Top Taupe, Whisper White and Rose Red.  The flowers were cut from Rose Red patterned paper from the Love Bossoms Designer Series Paper Stack using the Botanical Builder Framelits.

Create the folder front and before you adhere it down make sure that you have put your ribbon around the cover so that you can tie a bow on the side to keep it closed.  I used about 26" of ribbon, this allows you to tie the bow easily.


To create the cover just score a piece of A4 cardstock in half portrait and then in half landscape.  Fold and burnish all the score lines.  Using your Stampin' Trimmer cut on the diagonal  on two sides from the centre score line to the edge of the middle score line to create the pockets for the card.  There is no adhesive required, it just folds up into a little booklet.


I made the 4 cards all the same, just changing up the sentiment to Thanks, Just A Note, Celebrate and Happy Birthday.  I thought that this would cover a lot of occasions where these cute little cards would be appropriate.


This project was actually quite quick to make as I made the cards all the same just changing the sentiment.  Also Stampin' Up make it so easy with the Note Cards and Envelopes already made for us.

Thank you for visiting.

Carolyn

Saturday, 9 January 2016

80th Birthday

My Mum is 80 today, yeah!!  Happy Birthday to you, Happy Birthday to you, Happy Birthday dear Mum, Happy Birthday to you.  To celebrate we are having an afternoon tea with a small gathering. Mum did not want a big fuss so a small gathering was the compromise as we could not let such a milestone pass with out celebrating.

For a special lady I had to make a special card.  Mum loves the Soft Sky, Silver and Whisper White colours together so this is the colour theme that I use on her card.


I used the stamp sets "Grateful Bunch" and "Amazing Birthday", Blossom Bunch Punch, Metallic Doilies, Silver Glimmer Paper, Soft Sky and Whisper White cardstock, Scalloped Tag Topper Punch, 1/8 Silver Ribbon, Metallics Sequin Assortment, Iced Rhinestones and Jewels Basic Rhinestones.

Thank you for visiting.

Carolyn

Friday, 8 January 2016

Special Friend...

I confess, I did not get around to sending out Christmas Cards this year and I really, really, really should have sent one to a very good friend who lives on the other side of Australia.

So I decided to make her a very special card for a special friend.


For the background I stamped the Writing Notes stamp in Soft Sky ink onto Whisper White cardstock.  I then stamped some of the images from the Timeless Textures stamp set with Crumb Cake and Tip Top Taupe, first, second and third generation stamping to get the various shades of the images.  The butterfly is from the Grateful Bunch stamped in Tip Top Taupe.   The small splatter images is from the Timeless Textures stamp set which was stamped with Rose Red ink.

The other embellishments include Metal Rimmed Pearls which are part of the Weekly Deals which you can find here.  Just click on the Shop Now tab.  The flower is made using the Botanical Builder Framelits and Designer Series Paper from the Love Blossoms Paper Stack.  The leaves were from the same Framelits set, die cut in Whisper White with Tip Top Taupe sponged on the edges.  I have added a small silver doily from the Metallic Foil Doilies pack and also I cut down one of the White Lace Doilies which I slipped under the Sahara Sand Lace Trim.  Silver Metallic Thread was layered under the flower which was finished with a Crumb Cake Candy Dot added to the flower centre.


Thank you for visiting.

Carolyn

Friday, 18 December 2015

Beautiful Bunch...

The parcel delivery man arrived from Australia Post this morning, I am one happy stamper.  I put my order in on the 3 December and I have been waiting for it to arrive ever since.  Apparently there was a freight train derailment on the 4 December about 350 km east of Kalgoorlie and it was only fixed on the 11 December, so all the parcels from the Eastern States were backed up on the freight trains waiting to get across the Nullabor.  I feel sorry for the Australia Post workers who now have to sort and deliver the backlog of thousands of parcels.

I was lucky enough to win the "Grateful Bunch" stamp set in a Prize Patrol at the On-Stage Local Event held in Perth on 15 November.  I ordered the coordinating Blossoms Bunch Punch as part of my Occasions Catalogue pre-order and this is what I have been waiting for.  I went a little crazy stamping and punching and would like to share with you two of the cards I made.

The first card is using the "Faux Silk" background technique in a classic Basic Black and Whisper White colour scheme.  I cased the background idea from Alison Okamitsu  who is a member of the 2015/16 Stampin' Up Artisans Team.   The Artisans Team posted their first projects yesterday, so if you have not had a chance to do the Blog Hop check it out.  There is some great inspiration.


The second card is using a colour scheme of Elegant Eggplant and Whisper White.  The flowers were stamped in Elegant Eggplant and Dazzling Diamods added to great some bling.


The flowers do not show up as pretty in the photo, but they are all sparkling and catch the light when you move the card onto different angles, so pretty.


Now off to dig into my box of goodies to see what else I can play with this afternoon.  I have a holiday from work today, so I am doing absolutely nothing but stamping and creating.  What fun.

Thank you for visiting.

Carolyn
Built for Free Using: My Stampin Blog