Showing posts with label To a Wild Rose. Show all posts

Tuesday, 13 August 2019

Tuesday Challenge #26

Hi everyone, sharing my project this week for my Tuesday Challenge.  I have tried something a little different this week by using one of the Copper Dotted Treat bags on my cards.

The stamp sets I have used are To A Wild Rose, Merry Christmas to All, Beautiful Bouquet and Piece of Cake.


I cut the sides and bottom off the bag and then cut away the seam where the bag joined on the back.  This left me with a large strip that I have used on my first card.  I flagged one end and put a piece of Copper Foil Sheet behind.


My second card uses the large front piece from the bag that I have cut down to fit my card front. You will be left with a long strip that I have used to decorate the inside of the card.


My final card uses the other strip from the back of the bag, I have cut this in half so you get two of these cards from this strip.

The colours used on the flowers are Merry Merlot and Rococo Rose with Mossy Meadow for the leaves.

Hope you enjoy my creations for this week.

Thank you for visiting.

Carolyn

Wednesday, 31 July 2019

'Z' Fold - To a Wild Rose

Hi everyone sharing the final project that the ladies made at last Sunday's Class.  This is a 'Z' fold card made using the To a Wild Rose stamp set, the matching Wild Rose dies and the gorgeous Magnolia Lane Designer Series Paper.


We used the Stamparatus in class to stamp the flower using Terracotta Tile and Petal Pink inks.  The ladies were amazed at how easy it was to stamp the 3 images that make up the flower and they lined up perfectly.  They also love that if you missed stamped then you could just stamp the image again and you would never know that you had missed stamped.

Have you noticed that I have used the To a Wild Rose stamp set a lot lately, this is because I just love it.  I have even left it set up on my Stamparatus as I know that I am going to want to use it again soon, I love it that much.

If you live in Australia
you can get all the supplies you need
for this project from me.

You can place an order online or Contact Me and place an order. 


Thank you for visiting.

Carolyn


Thursday, 25 July 2019

Group Swap

Hi everyone, as promised a card with a flower on it.  This is the card I made for our Stamparoos Group Swap using the To a Wild Rose stamp set and the matching Wild Rose dies.


The sketch I have used was created by Dawn Griffith, I just made the 3 pieces behind the stitched rectangles a little bit wider.


The colours I have used on the flower are Blushing Bride and Rococo Rose, with Mossy Meadow being used for the leaves.  Please note that I stamped off once for the centre of the leaves.

The cardbase is Basic Gray, the 3 strips Gray Granite with the stitched rectangles being Blushing Bride and Whisper White.

If you live in Australia
you can get all the supplies you need
for this project from me.

You can place an order online or Contact Me and place an order. 


Thank you for visiting.
Carolyn

Tuesday, 2 July 2019

Tuesday Challenge #20

Hi everyone, sharing this week's project for my Tuesday Challenge where I have challenged myself to make a card or project using products from the Annual Catalogue.

My stamp set of choice this week is 'To A Wild Rose' and I have also used the Wild Rose Dies.  I was unpacking the project boxes from my Fundraiser on the weekend when I got side tracked by this stamp set which was in one of the boxes.  It was all set up on the Stamparatus and I just could not resist.  This is the end result of my playtime.


There is just something about pink, gray and white together that I find very appealing.

The Stamparatus made stamping the flowers so easy.  I used Rococo Rose and Blushing Bride for the flowers and Mossy Meadow for the leaves.


For this card I did a water colour wash on the background using Blushing Bride before arranging the flower, leaves and other elements on the card front.  A little bit of Silver Metallic Trim was added behind the flower.

TIP:  The Basic Gray die cut element behind the flower is too wide for the portrait orientation of the card, so I cut a section out and rejoined it where it is covered by the flower.


I had only intended to make one card and this is the first card that I made.  After I had cut the strip of Basic Gray Designer Series Paper I thought why not and cut the remainder into strips that I could use on my card designs.  I got 4 cards out of the one 6" x 6" piece of Designer Series Paper.

This card uses a 1" strip of Designer Series Paper.


This card uses two strips of the Designer Series Paper cut at 3/4" wide each.  They were adhered to the piece of Whisper White cardstock for the centre panel and trimmed to length to fit the card front.


This card uses a 1 1/2" strip of Designer Series Paper.  This card is my favourite out of the set of cards.


This card uses a 2" strip of Designer Series Paper with a little Rococo Rose cardstock added as a trim.

This little set of cards would make a great gift and you can package them up using the Acetate Card Boxes.

If you live in Australia
you can get all the supplies you need
for this project from me.

You can place an order online or Contact Me and place an order. 


Thank you for visiting.

Carolyn


Sunday, 30 June 2019

Fundraiser - Junior Diabetes Research Foundation

Hi everyone, sharing the projects that the ladies made at the fundraiser I held yesterday for the Junior Diabetes Research Foundation.

I had 40 ladies attend the fundraiser and they had a great time making the cards and catching up with everyone. We raised $4,040 AUD which I think is an amazing effort by everyone.

A big thank you for all those who supported the day, it is very much appreciated.

I have been designing and cutting up kits for the last 8 weeks (in between working full time), so have not been making a lot of projects to post on my blog so hopefully you enjoy these.
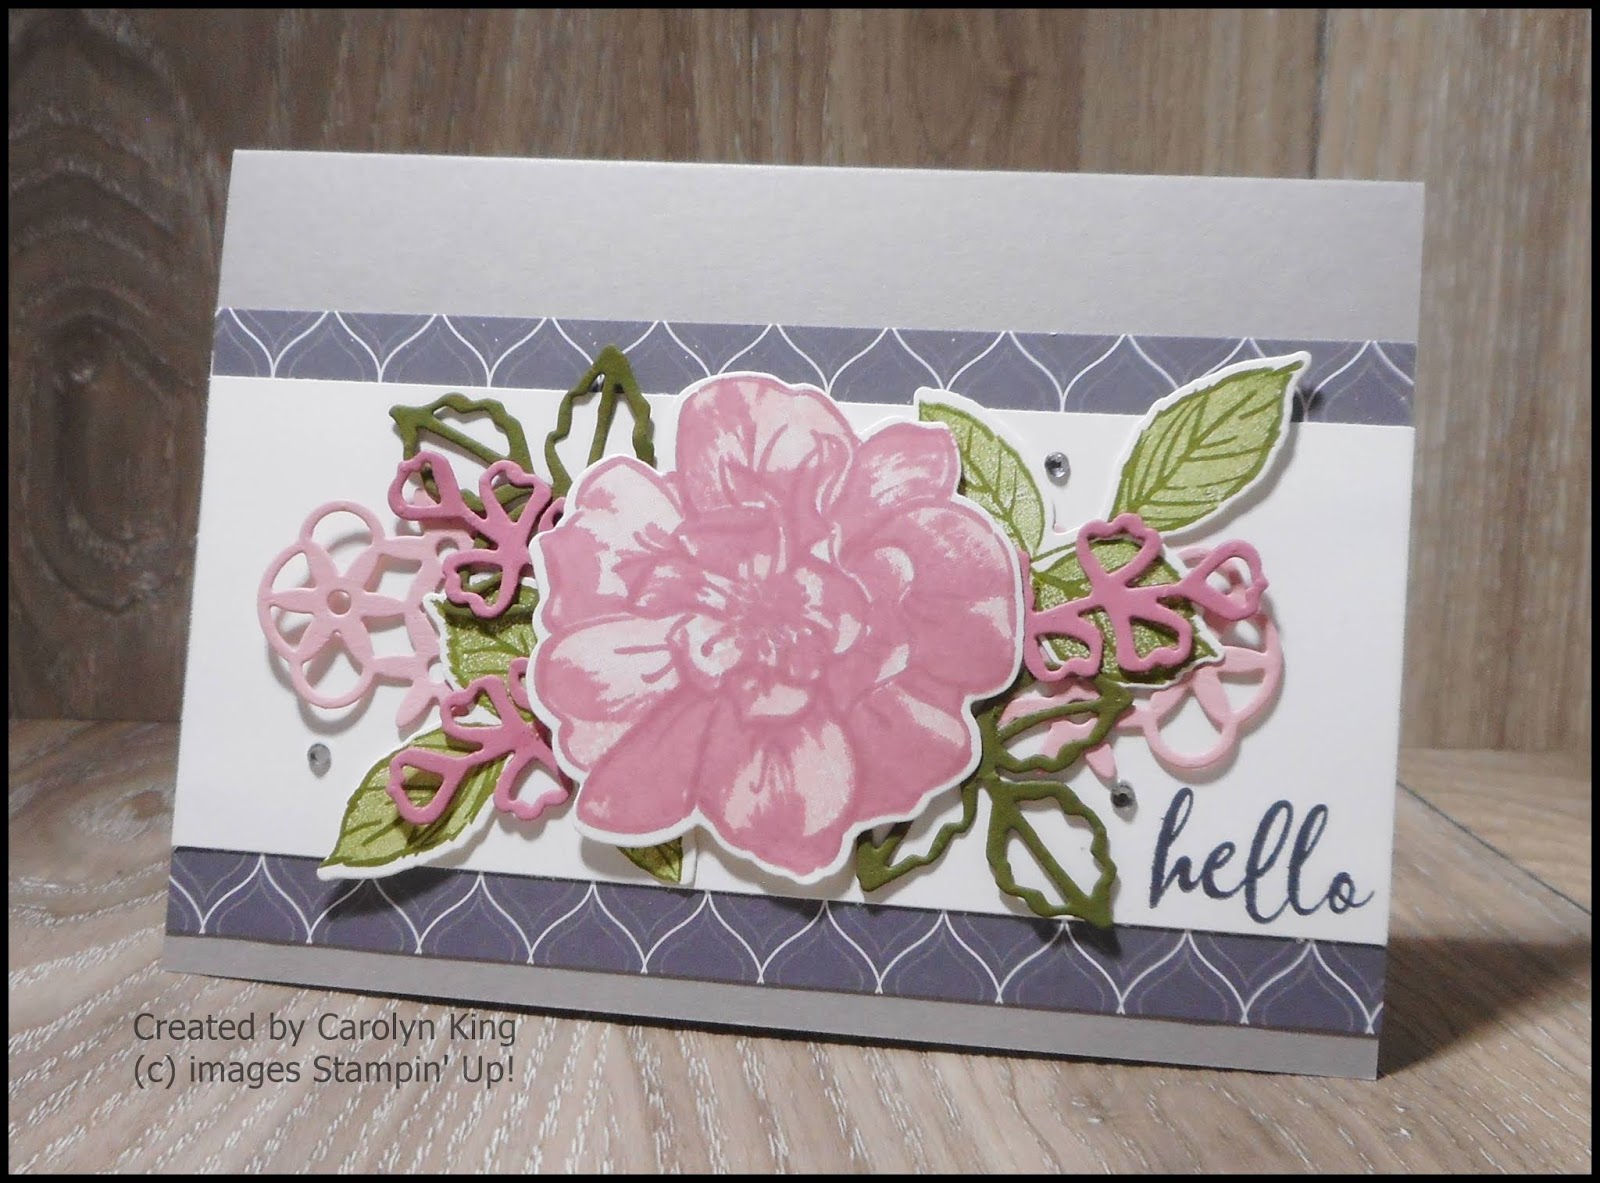
Card 1

This card uses the gorgeous Magnolia Lane Designer Series Paper, Good Morning Magnolia stamp set and the Magnolia Memory Dies.

The Magnolia was coloured using Petal Pink (Light & Dark) and Mossy Meadow (Light & Dark) Stampin' Blends.


Card 2


This card uses the Broadway Birthday stamp set. The Designer Series Paper I have used on this card is now retired as I actually designed this card in April ready for my fundraiser.  You could use other Designer Series Paper to get a similar look.


Card 3


This card uses product from the Come Sail Away Suite.  I love all the products in this Suite and I know I will be making a lot of projects using this Suite.


Card 4


This card uses the Magnolia Lane Large Specialty Memories & More Cards and Envelopes and the Free as a Bird stamp set.

The image was coloured using and Aquapainter and Crumb Cake, Soft Suede, Blushing Bride, Rococo Rose, Crushed Curry, Pear Pizzazz and Mossy Meadow ink.


Card 5


This card uses the Over the Moon stamp set.  I cannot remember who first stamp the 'Cow Paper' that I have CASED and there are so many demonstrators doing it now that it is hard to find the original idea.  So whomever you are, thank you so much for such a great idea.

I did two variations on how to put this card together.


Card 6

This card uses the oh so pretty Noble Peacock Suite.  How amazing is the Noble Peacock Specialty Designer Series Paper.


Card 7


This card uses the To a Wild Ride stamp set.  The rose is a 3 step stamped image and the Stamparatus is the perfect tool to use when stamping the rose.  


Card 8

This card uses the Above the Clouds and Waterfront stamp sets and the coordinating Hot Air Balloon Punch.  This card is my favourite,


Thank you for visiting.
Carolyn

Wednesday, 12 June 2019

Tuesday Challenge #17

I know it is Wednesday, and I am a day late in posting my Tuesday Challenge card.   I have been rather busy the last few weeks designing projects and getting ready for my Junior Diabetes Research Foundation Fundraiser that I am holding on the 29 June, time just slipped away.  I had already made my card but forgot to post it and it was not until I was getting ready for work this morning that I remember it.

I have used the 'To a Wild Rose' stamp set and the matching 'Wild Rose' dies.


My Petal Pink stamp pad was rather juicy when I stamped the rose image. I should have stamped off once to get a better contrast but it still looks okay.

I stamped the outline image using Terracotta Tile ink and then stamped two layers of the rose with Petal Pink.

Did you notice the background behind the rose?  This was stamped using the 'Artisan Textures' stamp set.  This stamp set has great stamps for adding that little bit of texture to your creations.  I am not very good a doing watercolour backgrounds, but I do not have to worry as one of the stamps in the set is perfect for creating a similar look by just stamping.


If you live in Australia
you can get all the supplies you need
for this project from me.

You can place an order online or Contact Me and place an order. 


Thank you for visiting.
Carolyn