Hi everyone, sharing two of the projects the ladies made in today's class using the Painted Season Designer Series Paper and the Painted Seasons stamp set which are part of the current Sale-a-bration Promotion along with the Four Seasons Framelits that you can purchase separately.
I love this gorgeous Designer Series Paper and I have used Poppy Parade as the card and bag base as it coordinated perfectly.
To make the card you will need:
Measurements
Poppy Parade Card Base
Whisper White cardstock
10cm x 14.3cm (for the inside)
Early Espresso
cardstock 6.7cm x 13.1cm
Early Espresso
cardstock 5.5cm x 10.5cm
DSP (large floral)
6.3cm x 12.7cm
DSP 5.1cm x 10.1cm
Early Espresso
cardstock 9cm x 9cm for Scalloped Square
Whisper White cardstock
7.5cm x 7.5cm for Stitched Shape Square
Whisper White cardstock
for the flowers and leaves
Technique
- Card
Fold card base.
Ink up the flower stamp with Poppy Parade ink, stamp off, and then add
Early Espresso ink using a sponge dauber and then stamp on a piece of Whisper
White cardstock. Stamp 3 flowers – 2 for
the card and 1 for the little bag. Cut
out using the matching die.
Stamp the leaf image 6 times using Call Me Clover ink, stamping off –
4 for the card and 2 or the little bag.
Cut out using the matching dies.
Adhere the DSP to the Early Espresso mats and adhere to the card
front.
Die cut the Early Espresso Scalloped Square and the Stitched Shape
Square. You can stamp the sentiment
before you die cut or after. Adhere these together and adhere to the card front
using dimensionals. Arrange the flower
and leaves, adhering the flower using dimensionals. The sentiment is from the Itty Bitty Birthdays stamp set.
For the inside adhere the flower image and the two leaf images to the
bottom right corner and adhere to the card inside.
To make the bag you will need:
Measurements
I have used imperial measures for the bag as I find it easier for all the scoring and cutting.
Cut a piece of Poppy Parade cardstock 8 ¾” x 4 ¼” (If you cut the 4 ¼” cut at 10.5cm instead you will get two bags from one piece of A4 cardstock, there is a
slight difference in measurement however it does not matter).
DSP 3” x 3”
Poppy Parade cardstock for the circles
Technique – Bag
Take the piece of cardstock and
- Score on the long edge at 3 1/8”, 4 1/8”, 7
¼” and 8 ¼”
- Score on the shore edge at 1”
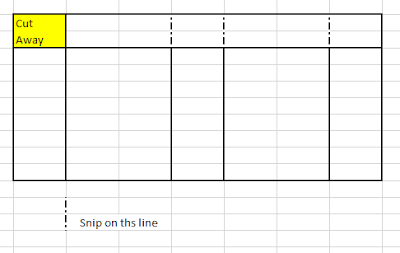
Cut as per the diagram. DO NOT
ADHERE TOGETHER AT THIS STAGE
Adhere the DSP to the front and back of the bag.
Before making up the bag base, cut two circles from Poppy
Parade cardstock using the second largest Stitched Shaped Circle Framelit. Adhere these in place on the DSP, making sure
to only adhere half the circle in place.
Take the 1 5/8” circle from the Layering Circle
Framelits and cut out the centre of the circles creating the handles on the
bag.
Adhere the sides and bottom of the bag in place. Add the flower and leaves to finish.
If you live in Australia
you can get all the supplies you need
for this project from me.
You can place an order online or Contact Me and place an order.


No comments:
Post a Comment