Hi everyone, have you ever had an idea and it just evolved into something a bit more than what you had imagined? This is what happened to me when I sat down at my craft table (really the kitchen table) to stamp some cards for Ronald McDonald House Charity so that I could take them along to the On Stage Local event here in Perth on 8 April.
I started out with a few card sketches and ideas to create my cards. I then thought to get the most out of my Designer Series Paper I would design a One Sheet Wonder. I was wanting to use the Delightful Dijon floral paper in the 2015-17 In-color Designer Series Paper Stack and had worked out a colour scheme of Basic Black, Whisper White, Delightful Dijon and Always Artichoke.
This is the cutting layout. It is not to scale and it is in metric as this is what we use in Australia, however to convert to imperial you can use a conversion chart.

NOTE: The dimensions for Card 9 should read 8.5cm x 12.8cm. You will have a small 0.4cm leftover piece that you will need to discard or you can add it to Card 12. You will just need to alter the cutting plan for this card to compensate for the extra length.
So I started creating my cards and then the Gold and White striped card tin that is in the Sale-A-Bration catalogue was whispering to me from my craft cupboard where I had stashed it when it arrive a couple of weeks ago. This is what happened.

I made 14 cards from the one sheet of 12" x 12" Designer Series Paper. I used the stamp sets Special Reason and Gorgeous Grunge, the Stylish Stems Framelits, Flourish Thinlits and the Lovely Lace Textured Impressions Embossing Folder.


To decorate the tin I die cut a piece of Basic Black cardstock for the cut out flower (not sure how to describe this but it is just the out line of the petals). I then stamped the large flower with Delightful Dijon and added some of the Pumpkin Pie colour from the Watercolor pencils (I will explain later in this post on how I did this). The leaves were stamped with Always Artichoke and added some Basic Black colour from the Watercolour pencils. These were then cut out using the Stylish Stems Framelits. These were adhered to the tin using Ranger Glossy Accents as this was the only glue that I had on had to stick these images to the tin. I knew that they would stay there and not come off as I used Glossy Accents.
The word "Cards" was then cut out using the Large Letters Framelits and Basic Black Cardstock. These were also adhered using the Glossy Accents. A Basic Black Baker's Twine bow was added to finish decorating the tin.

Over the next week I will be sharing with you how I made each card.
Card 1
I started stamping without doing any watercolouring. The cards look okay but imagine if you added some watercolouring (I still cannot get used to the non English spelling of color it just does not seem right, colour is more like it).
Don't know how to watercolour? I will let you in on a little secret, neither do I. I just go with what appeals to me, whether it is the correct technique or not. I call this cheats watercolouring or faux watercolouring as you stamp the image, add some watercolour pencil and then blend and move the colour around with an Aquapainter. I have posted how I did this after the card instructions for Card 1.
The card below is just the stamped images.

This is the same card but after I had done the watercolouring. What a difference, it just makes the flowers pop.
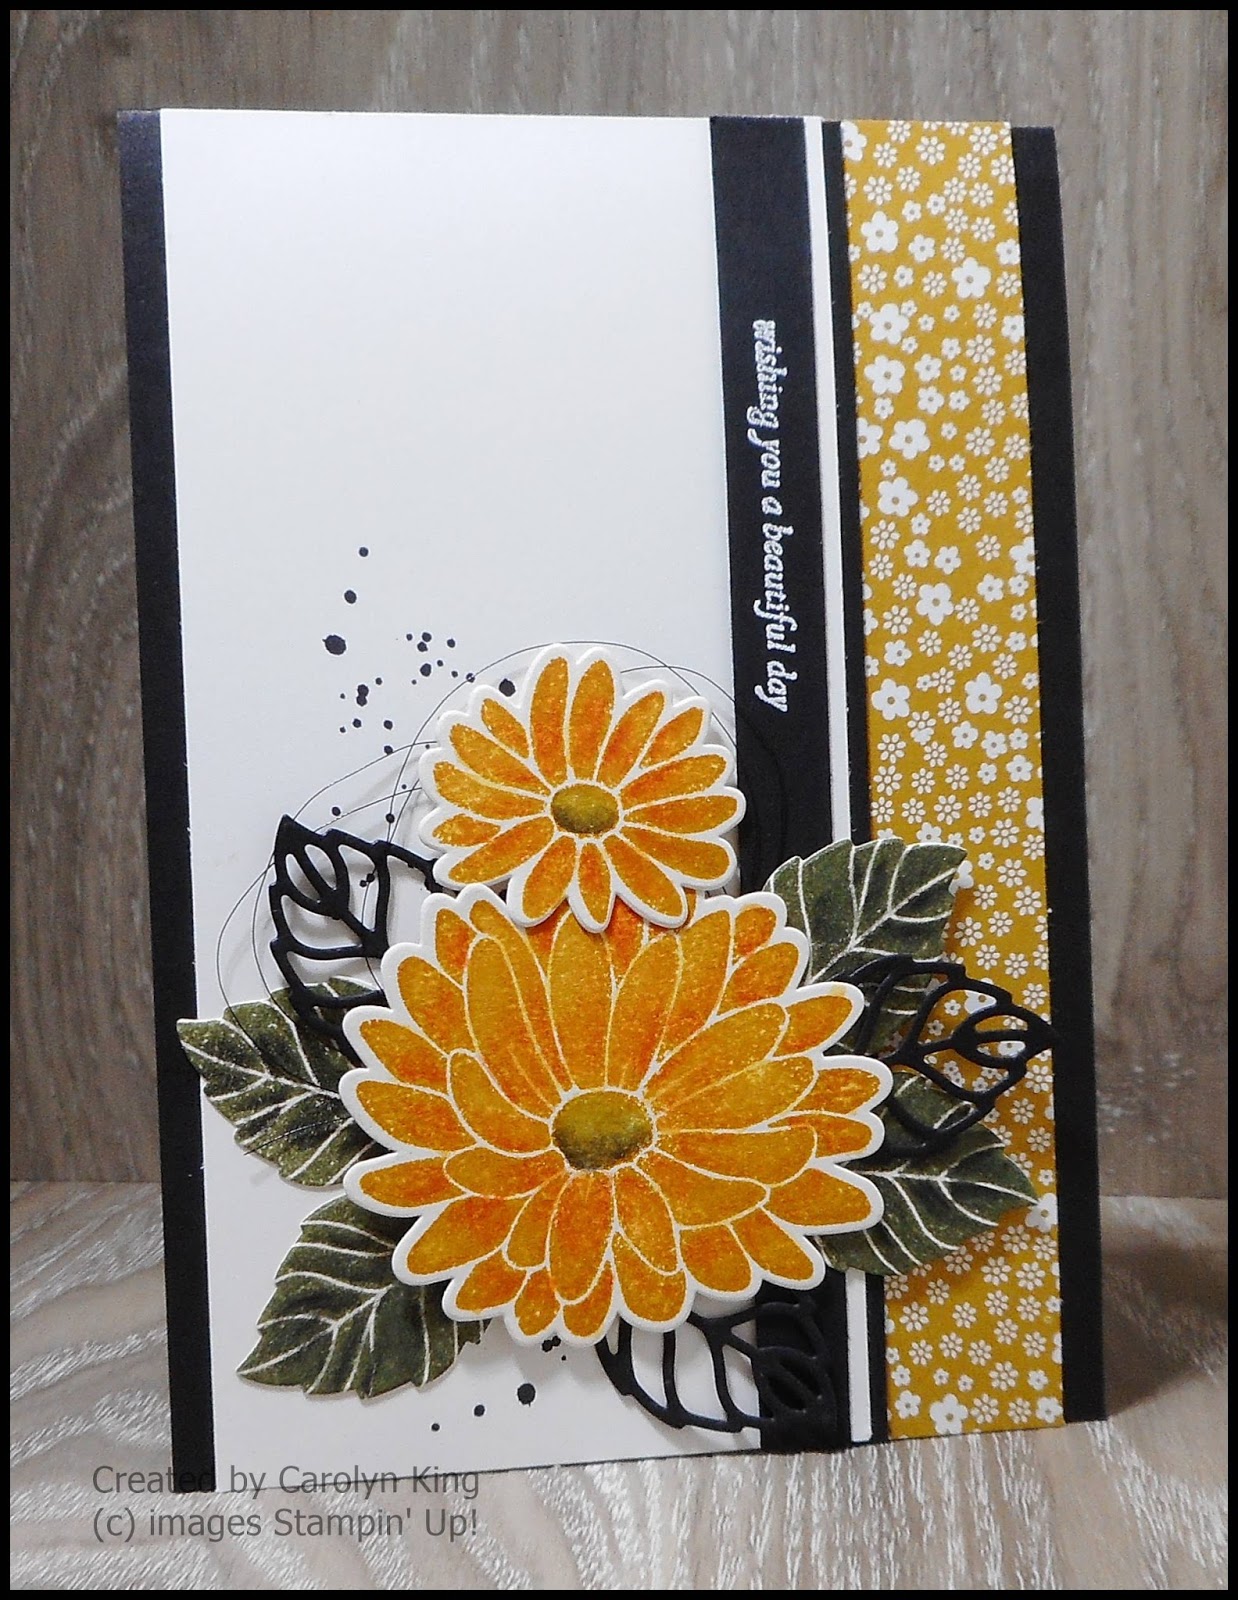
Dimensions for this card are:
A4 piece of Basic Black cardstock cut in half lengthwise. This is then folded in half to create the card base.
Cut a piece of Whisper White 9.5cm x 14.8cm.
Cut a piece of Designer Series Paper 2.5cm x 14.8cm
Cut a piece of Whisper White cardstock 1cm x 14.8cm
Cut 2 pieces of Basic Black cardstock 1cm x 14.8cm
Adhere the Designer Series Paper to the piece of Whisper White cardstock, lining it up on the right hand edge. Use the picture as a guide. Then adhere one of the Basic Black strips to edge of the Designer Series Paper and then adhere the Whisper White piece to this, leaving a small strip of Basic Black showing.
Stamp the sentiment on the other piece of Basic Black cardstock using Versamark, add White Embossing Powder and heat set. Adhere this to the Whisper White strip of cardstock leaving a small white border showing. Using Basic Black Archival ink stamp the dot image from the Gorgeous Grunge Stamp Set on the bottom of the Whisper White piece that you have just adhered the strips to. Adhere this piece to the card front leaving a small strip of Basic Black either side. Refer to the picture above.
Stamp and colour the flowers and leaves. I used Delightful Dijon for the stamped flowers with Pumpkin Pie Watercolour Pencil and Always Artichoke with Basic Black Watercolour Pencil for the leaves. Cut them out using the Stylish Stems die cuts. Also cut out some Basic Black leaves. Add some Basic Black Metallic Thread to the card front and arrange the leaves and flowers how you like.
For the inside of the card adhere the strip of Designer Series Paper 1.5cm x 10cm to a piece of Basic Black cardstock 2cm x 10cm and adhere across the bottom of a piece of Whisper White cardstock cut at 14.3cm x 10cm.

Watercolouring

The first picture shows the stamped images with the Watercolour pencil just coloured in at the base of the petals and also along the centre ridge of the leaves. I used Shimmery White cardstock to stamp and watercolour all the images. The flowers were stamped with Delightful Dijon and then Pumpkin Pie Watercolour Pencil added. The leaves were stamped with Always Artichoke and Basic Black Watercolour Pencil added.

The second picture shows the flowers and leaves after the colour has been blended and moved around using an Aquapainter. The difference is subtle but is leaves a terrific finish.
Card 2

A5 piece of Delightful Dijon cardstock (this is A4 cut in half) folded in half to create the card base.
Cut a piece of Basic Black cardstock 14.3cm x 10cm. Adhere to card front.
Cut a piece of Whisper White cardstock 13.8cm x 9.5cm. Put this through the Lovely Lace Textured Impressions Embossing folder and then adhere to the card front.
Cut a piece of 6.5cm x 12cm Basic Black cardstock.
Cut a piece of Whisper White cardstock 6cm x 11.5cm. Stamp the dotted image from the Gorgeous Grunge stamp set using Basic Black Archival ink on this piece. Adhere to the 6.5cm x 12cm Basic Black cardstock piece and adhere to the card front. Use the picture above as a guide.
Cut a piece of Designer Series Paper 10.5cm x 3.8cm. Adhere this to a piece of Basic Black cardstock 10.5cm x 4.2cm. Adhere this to the card front, using the picture as a guide.
Stamp and watercolour a large flower, a small flower and 4 large leaves. Cut these out using the Stylish Stems Framelits. Also cut 3 Basic Black leaves using the Stylish Stems Framelits. Adhere some Basic Black Metallic thread in place and then arrange the flowers and leaves as you like, refer to the picture for placement.
Stamp the sentiment on a piece of Basic Black cardstock using Versamark Ink, add White Embossing Powder and heat set. Punch this out using the Classic Label Punch. Adhere this onto a piece of Burlap Ribbon and then adhere this to the card front.
For the inside of the card adhere the strip of Designer Series Paper 1.5cm x 10cm to a piece of Basic Black cardstock 2cm x 10cm and adhere across the bottom of a piece of Whisper White cardstock cut at 14.3cm x 10cm.
You can get all the supplies you need
for this project from me.
You can place an order online and join in the fun with the On-line Club or Contact Me and place an order.
Don't forget Sale-A-Bration.
For every $90 AUD you spend you get to choose a free item
from the Sale-A-Bration catalogue.
Thank you for visiting.
Carolyn


Thank you for sharing the information on your One Sheet Wonder and the beautiful cards! I love them all!
ReplyDeleteYour one sheet wonder cards are stunning, as is all your work. And I love the coordinated box for them. I love one sheet wonders and you've just given me another reason to love it! Thanks for generously sharing your talent.
ReplyDeleteSusie Nelson
Beautiful! I just love these cards!
ReplyDeleteThis is a fabulous project set. I've stock piked a few tins to make up gift sets to sell at craft fairs. Thank you so much for sharing your OSW measurements. x
ReplyDeleteI love these pretty cards and your one sheet wonder chart. Enjoy your day!
ReplyDeleteThank you so much. I have such a hard time getting my head around Inches and couldn't find any one page wonder layouts in cms, thank you, thank you, thank you.
ReplyDeleteYour cards are beautiful.