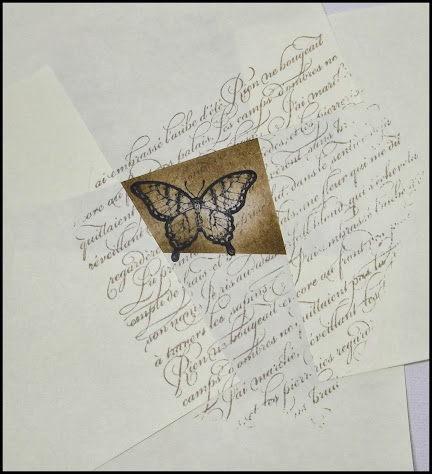
Showing posts with label Papillon Potpourri. Show all posts

Sunday, 27 July 2014

Mojo #355

Hi everyone, I would like to share my card with you that I have made for the sketch challenge at Mojo Monday this week.
I really liked the vintage look that I used in my picture frames from yesterday, so I have used the same colours for my card. 


I inked and stamped the Typeset DPS with Lost Lagoon and Baked Brown Sugar using the "Kinda Eclectic" stamp set.  The sentiment is from the "And Many More" stamp set and a butterfly has been added from the "Papillon Potpourri" stamp set.  The pearls for the flower centres were coloured using the bronze blendability from the skin tone set.


mojo 355

Saturday, 26 July 2014

Vintage Typeset

I have been getting back into scrapbooking (my first love before I got into card making).  I made these 3 picture frames to hang on my wall, and as the photographs are of my grand parents and great grand mother and great uncle I wanted to give the frames a vintage feel.


I purchased the 6" x 6" scrapbooking frames from Spotlight.  They are raw wood so I made a distress wash of Baked Brown Sugar with 5 drops of reinker with a little water to distress them with.  Once this colour was dried I found is was not quite the colour that I was after, so I made another distress wash with Early Espresso and painted this over the Baked Brown Sugar.  This is the colour that I was happy with for my frames, it ended up like a Walnut Stain finish.


I used the Typeset Specialty DSP to cover all the frames.


For the first frame I randomly sponged on some Lost Lagoon and then stamped the leaf stamp from the Kinda Electic stamps set in Baked Brown Sugar.  All the edges were inked with Baked Brown Sugar.


Vintage Typeset

For the second frame I sponged Lost Lagoon on a piece of Basic Black Neutrals Paper Stack DSP for the background.  Again all the edges were inked with Baked Brown Sugar.


Vintage Typeset 1

For the third frame I stamped butterflies from the Papillion Potpourri stamp set in Baked Brown Sugar over the Typeset DSP.  The background piece had the leaf stamp from the Kinda Eclectic stamp set stamped randomly with Lost Lagoon.

Vintage Typeset 2


Sunday, 30 March 2014

Creating Backgrounds - Retiform Technique

At a recent get together of the Stampin' Up group that I belong to, I was asked to demonstrate some backgrounds created by using various techniques.  As promised to the Stampin' Up ladies at our get together I will be posting over the next week instructions and photos of the backgrounds that I demonstrated.


The first background is the Retiform Technique which I found on Splitcoast Stampers with a great tutorial .  This is a great technique using post-it notes and cardstock scraps to create the masks for the sponging and stamping.


I started with a piece of Naturals White cardstock and using a scrap of Naturals White to create the mask, I sponged on Baked Brown Sugar ink for my first line.  There is no correct pattern to this, just create your gridlines where you want then to go.  Below are a pictures of the first steps, sponging on Baked Brown Sugar to create the divisions where you will be stamping.  I sponged so that the ink is on the inside of the lines, however you can sponge so that ink is on the outside of the lines.  It just depends upon what effect you want to create, experiment to see which method you like best, just be consistent otherwise the technique will not work.


The next step is to sponge a light base colour over the entire piece.  I have used Crumb Cake, this is done randomly, leaving some light patches (just make sure that you have inked over the entire piece so that no Naturals White is showing through).

You are now ready to start stamping.  Mask off the centre piece with Post-it Notes to stamp the first image.  It does not matter if you off stamp over the edge of the mask, it does look better if some of the images are stamped off centre or partially off the masked piece.  Build up each section using a variety of stamps and inks to create the effect that you want.
You continue to mask off the various sections and continue stamping until you have built up the piece and all the sections have been stamped.  I used Jet Black Staz-on, Baked Brown Sugar and Crumb Cake for the stamping along with stamps from the En Francais, Backyard Basics, Flowering Flourishes, Papillon Potpourri and Everything Eleanor stamp sets, along with the Music Note Stampin' Wheel.  (Tip:  I take the stamp off the Stampin' Wheel and fix it to a piece of Perspex to create a stamp which I find much easier to use than the Stampin' Wheel).  The sentiment is from the Peaceful Petals stamp set.


Once the background piece is finished you can now make your card.  I have used a Basic Black card base, along with some Victoria Crochet Trim and the Scallop Oval and Large Oval punches for the sentiment.
Inside of the card - I try and finish the inside of my cards to match the front.  It just gives a nice finishing touch instead of a blank card inside.
This is a very basic technique but you can get some terrific effects with it by using different grid patterns and ink colours.


The card below is one that I cased from Gina K designs, I just loved the colours (I used Always Artichoke, Crumb Cake and Early Espresso on Naturals White and Early Espresso cardstock.)  I used the same gridlines and design for my card above.

Sunday, 29 September 2013

Beautiful Butterflies

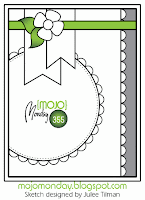
The challenge this week at the Deconstructed Sketch is based on this terrific sketch

 
I used the Faux Patina technique that I found on Splitcoast Stampers for my background with a colour scheme of Crumb Cake, Coastal Cabana and Early Espresso.
 
I cased the idea of the butterflies on the tag from Pat Carr.  At a recent shoebox card swap get together  Pat used this element on her card and I liked it so much I copied for an element on my card.


Sunday, 11 August 2013

Flower Shop

I have been playing with the "Flower Shop" stamp set and matching punch for my card class today.  I have made three completely different cards, to show the versatility of the stamp set.  I have also used a constant theme of embossing on Vellum.


Monday, 25 February 2013

Water Colour Crayons

I have been playing with my Stampin' Up Water Colour Crayons and these are the cards that I have made.

The first three cards are all the same colour sequence, using different background stamps, sentiments from the same set "Cross My Heart" in the new Seasonal Catalogue.  The embellishments on each card are also similar.  I have made this set for my next card class where we will be doing some basic backgrounds with the Water Colour Crayons.   I have quite a few ladies new to card making, so I am doing some very basic techniques to start with.

I have used Naturals Ivory as the base card and also for the piece that I did the Water Colour Crayons effect on.  I tried this to see how it went instead of the Water Colour Paper, and it worked okay so long as you do not put too much water on.  Also the blending is not as great as on Water Colour Paper, but with all the stamping etc on the piece you do not notice the imperfections in the blending.

I started by tearing two strips of the First Edition Specialty Paper and sticking this on the Naturals Ivory cardstock.  When these were dry I put my colours over the top.  The colours used on the first three cards are Regal Rose, Soft Suede and Crumb Cake which were randomly coloured over the piece with my paint brush and water.  I dried the pieces off with a heat gun to speed up the drying time (I am impatient).  I then used the Very Vintage Stampin' Wheel and Soft Suede ink to create the base background for the stamps, I then chose the stamps that I liked and stamped these in Basic Black on the piece.  The sentiments were hand cut and adhered using dimensionals.  The posy was made using linen thread, paper flowers from the Artisan Embellishment Kit, Crochet Trim and Tea Time Trinkets.  On the I Love You card, instead of the Crochet Trim I used two hearts made using the Full Heart Punch and the Scalloped Heart of Hearts Embosslit die, I then inked them in Soft Suede .  The edges of the centre pieces of all the cards were also inked with Soft Suede to give them a vintage feel.


This next card was made the same way but using the Water Colour Crayons Daffodil Delight and Elegant Eggplant.  I first stamped the image with Daffodil Delight and I then stamped over this with the Elegant Eggplant.  You can see the effect of the First Edition Specialy DSP on this card better than the previous cards. The stamp set used on this card is "Just Believe" and the sentiment was punched out using the Word Window Punch.


The final card was also made in the same way, however I used Soft Suede, Cajun Craze and Crumb Cake Water Colour Crayons and instead of randomly colouring I did the colour in stripes.  The background on this card was stamped using a piece of bubble wrap (I just had to try this after seeing it in a magazine).  I was trying to make a masculine card, but the Cajun Craze came out a bit on the pink side, but I went with it anyway.  The sentiment is from the "Itty Bitty Banners" stamp set and cut out using the Bitty Banners Framelits.  The circle piece was made using the 2 1/2" circle punch and the 3" circle originals die.  The stamps used on this are from "Clockworks" and "Need for Speed" stamps sets.

Sunday, 30 September 2012

Mojo Monday #260

The challenge this week at Mojo Monday is based on the following sketch:


I have decided to make a square card for this challenge using the stamp sets "Stippled Blossoms", "Papillon Potpourri" and "Petite Pairs" with a colour scheme of Early Espresso, Crumb Cake, Whisper White and a touch of Old Olive in the leaves of the flowers.  


Sunday, 23 September 2012

MOJO Monday #259

The post this week at Mojo Monday is based on the following sketch:


The stamp sets used on this card are Stippled Blossoms, Papillon Potpourri and Teeny Tiny Sentiments with a colour scheme of Crumb Cake, Whisper White, Early Espresso and Old Olive.