Showing posts with label Itty Bitty Christmas. Show all posts

Monday, 16 November 2020

Feels Like Frost Designer Series Paper - Day 11

Hi everyone, welcome to Day 11 of the Feels Like Frost Designer Series Paper projects.

I have chosen this piece of patterned paper for today's cards.


I have used the Itty Bitty Christmas stamp set along with the Poinsettia Dies, Stitched So Sweetly Dies and Ornate Frame Dies.


The card base is Whisper White Thick cardstock.  The patterned paper from the Feels Like Frost Designer Series paper is matted onto a piece of Basic Black cardstock cut at 5.5cm x 14.8cm (or 2 1/4" x 5 1/2") and then adhered to the card front.

The Basic Black Stitched Scalloped Rectangle is cut using the largest die in Stitched So Sweetly Dies.  A piece of Whisper White cardstock was cut at 9.2cm x 6cm (or 3 5/8" x 2 3/8") and then embossed using the Dainty Diamonds 3D Embossing Folder.

The poinsettia and foliage were cut using the Poinsettia Dies.  The sentiment was white heat embossed on a piece of Basic Black cardstock before being cut using the die from the Ornate Frames Dies.  Some of the Wonderful Gems were added to finish the card front.

Metric Measurement cutting guide.

Imperial Measurement cutting guide.

Hope you enjoyed the projects from Day 11 of the Feels Like Frost Designer Series Paper projects.

If you live in Australia

you can get all the supplies you need
for this project from me.

You can place an order online or Contact Me and place an order. 


Thank you for visiting.
Carolyn

Saturday, 14 November 2020

Feels Like Frost Designer Series Paper - Day 9

Hi everyone, welcome to Day 9 of the Feels Like Frost Designer Series Paper projects.

I have chosen this piece of patterned paper for today's cards


The stamp set used is the Itty Bitty Christmas along with the Poinsettia Dies, Ornate Layers Dies and Layering Squares Dies.


The piece of Whisper White cardstock was cut at 8cm x 14.8cm (or 3 1/8" x 5 1/2") and embossed using the Dainty Diamonds 3D Embossing Folder.  Two strips of Silver Foil Sheet were added top and bottom to this piece before adhering to the Misty Moonlight card base with Dimensionals.

The small squares of patterned paper were adhered to Scalloped Squares cut from Misty Moonlight cardstock and the 4th smallest Scalloped Square Die in the Layering Squares Dies.  These were then adhered to the card front.

The sentiment panel was cut using the Ornate Layers Dies and Whisper White cardstock.  The sentiment was stamped using Misty Moonlight ink.  The foliage pieces behind the sentiment panel were cut using Silver Foil Sheet, Vellum Cardstock and Poinsettia Dies.  A piece of the Seaside Spray Metallic Ribbon was adhered behind the sentiment panel before the panel was adhered to the card front using Dimensionals.  A few Rhinestone Basic Jewels were added to finish the card front.

The long strips can be used to decorate the inside of the cards or discarded, the choice is your.

You will get 5 of these cards from the one sheet of patterned paper from the Feels Like Frost Designer Series Paper Pack.  You will get 21 cards from the 4 sheets of patterned paper in the pack.

Metric Measurement cutting guide.

Imperial Measurement cutting guide.

Hope you enjoyed today's projects.

If you live in Australia

you can get all the supplies you need
for this project from me.

You can place an order online or Contact Me and place an order. 


Thank you for visiting.
Carolyn

Sunday, 8 November 2020

Feels Like Frost Designer Series Paper - Day 3

Hi everyone, welcome to Day 3 of the Feels Like Frost Designer Series Paper projects.  

For today's cards this is the piece of pattern paper I have used.


You will get 2 of these cards from the piece of patterned paper, so this is 8 of these cards from the 4 sheets of Feels Like Frost Designer Series Paper.


The 2 pieces were cut at 11.8cm x 7.5cm which left a long strip that was cut at 10cm x 1.7cm which I used to decorate the inside of the card.

This is the Metric measurement cutting guide.

This is the Imperial measurement cutting guide.


The stamp set used is Itty Bitty Christmas with the foliage pieces from the Poinsettia Dies.  The centre panel was cut using the Ornate Layers Dies.  Some of the gorgeous Seaside Spray Metallic Ribbon was added behind the centre sentiment panel.  To finish the card a few Rhinestones were added.

Hope you enjoyed the projects from Day 3 of the Feels Like Frost Designer Series Paper projects.

If you live in Australia

you can get all the supplies you need
for this project from me.

You can place an order online or Contact Me and place an order. 


Thank you for visiting.
Carolyn

Saturday, 7 November 2020

Feels Like Frost Designer Series Paper - Day 2

Hi everyone, projects for Feels Like Frost Designer Series Paper - Day 2.

For my projects on Day 2 I decided to use the Silver and White striped side of this piece of Designer Series Paper.


I have used the Itty Bitty Christmas stamp set and Poinsettia Dies for this card.  The embossing folder used is the Dainty Diamonds 3D from from the Annual Catalogue.


The Designer Series Paper was cut at 14.8cm (this is the width of the card base in landscape orientation) x 5cm.  You will get 3 cards from one sheet of paper, so this is 12 cards from the 4 sheets of this pattern paper in the Feels Like Frost Designer Series Paper Pack.

I matted the pieces of Designer Series Paper onto a piece of Basic Black cardstock cut at 14.8cm x 5.4cm.  I love this little pop of black along with the sentiment.  The sentiment panel was cut using the Ornate Frames Dies.

This is the Metric Measurements cutting guide.

This is the Imperial Measurement cutting guide.

The piece of Whisper White cardstock that has been embossed with the Dainty Diamonds 3D Embossing Folder is cut at 11.5cm x 6.3cm for Metric measurements or 4.5" x 2.5" for Imperial measurements .  I rounded the corners using the Detailed Trio Punch.  This piece was adhered to the card front using Dimensionals.

If you live in Australia

you can get all the supplies you need
for this project from me.

You can place an order online or Contact Me and place an order. 


Thank you for visiting.
Carolyn

Friday, 6 November 2020

Feels Like Frost Designer Series Paper - Day 1

Hi everyone, I have had a pack of the Feels Like Frost Designer Series Paper sitting in my stash for a while now so I set myself a little challenge to see what I could create with it.  So over the next 12 days I will be posting the cards that I made from each sheet and the cutting instructions.  In the paper pack you get 4 sheets 6" x 6"of 12 different designs, so this is a lot of cards. 

Sit back and enjoy what I have created.

For Day 1 the sheet of pattern paper I have chosen does a lot of the work for you.  It is so pretty.


This is the reverse side.  Each piece of paper has a picture on one side and a Silver and White pattern on the other. 


These are my cards.  You will get 4 of Card 1, 4 of Card 2 and 6 of Card 3 from the 4 sheets of pattern paper.


Card 1


Card 2


Card 3

This is the Metric measurement cutting guide. You only need 3 of the 5.8cm x 3cm for Card 3, so you will have 20 of these pieces from the 4 sheets which means that you will have 2 left as scraps at the end of your card making.  
I have also included the Imperial Measurements.


The Scalloped Stitched Rectangle is from the Stitched So Sweetly Dies and the sentiment panel is from the Stitched Rectangle Dies.  The gorgeous Poinsettia was made using the Poinsettia Dies and the stamp set I used is Itty Bitty Christmas. 
I love the Beaded Pearls that I have used for the Poinsettia Flower centre.  

Hope you enjoyed the projects for Day 1 of the Feels Like Frost Designer Series Paper.

If you live in Australia

you can get all the supplies you need
for this project from me.

You can place an order online or Contact Me and place an order. 


Thank you for visiting.
Carolyn

Monday, 2 November 2020

Joy to the World

Hi everyone, sharing the last of the projects from last week's class.  This one uses the Heartwarming Hugs Designer Series Paper and the Itty Bitty Christmas stamp set.


This card uses a lot of layers but I really liked the finished effect with the focus coming into the centre of the card.  A bit of die cutting required, however I think the result was worth the effort.

If you live in Australia

you can get all the supplies you need
for this project from me.

You can place an order online or Contact Me and place an order. 


Thank you for visiting.
Carolyn

Thursday, 22 October 2020

Winter Woods Christmas Tree

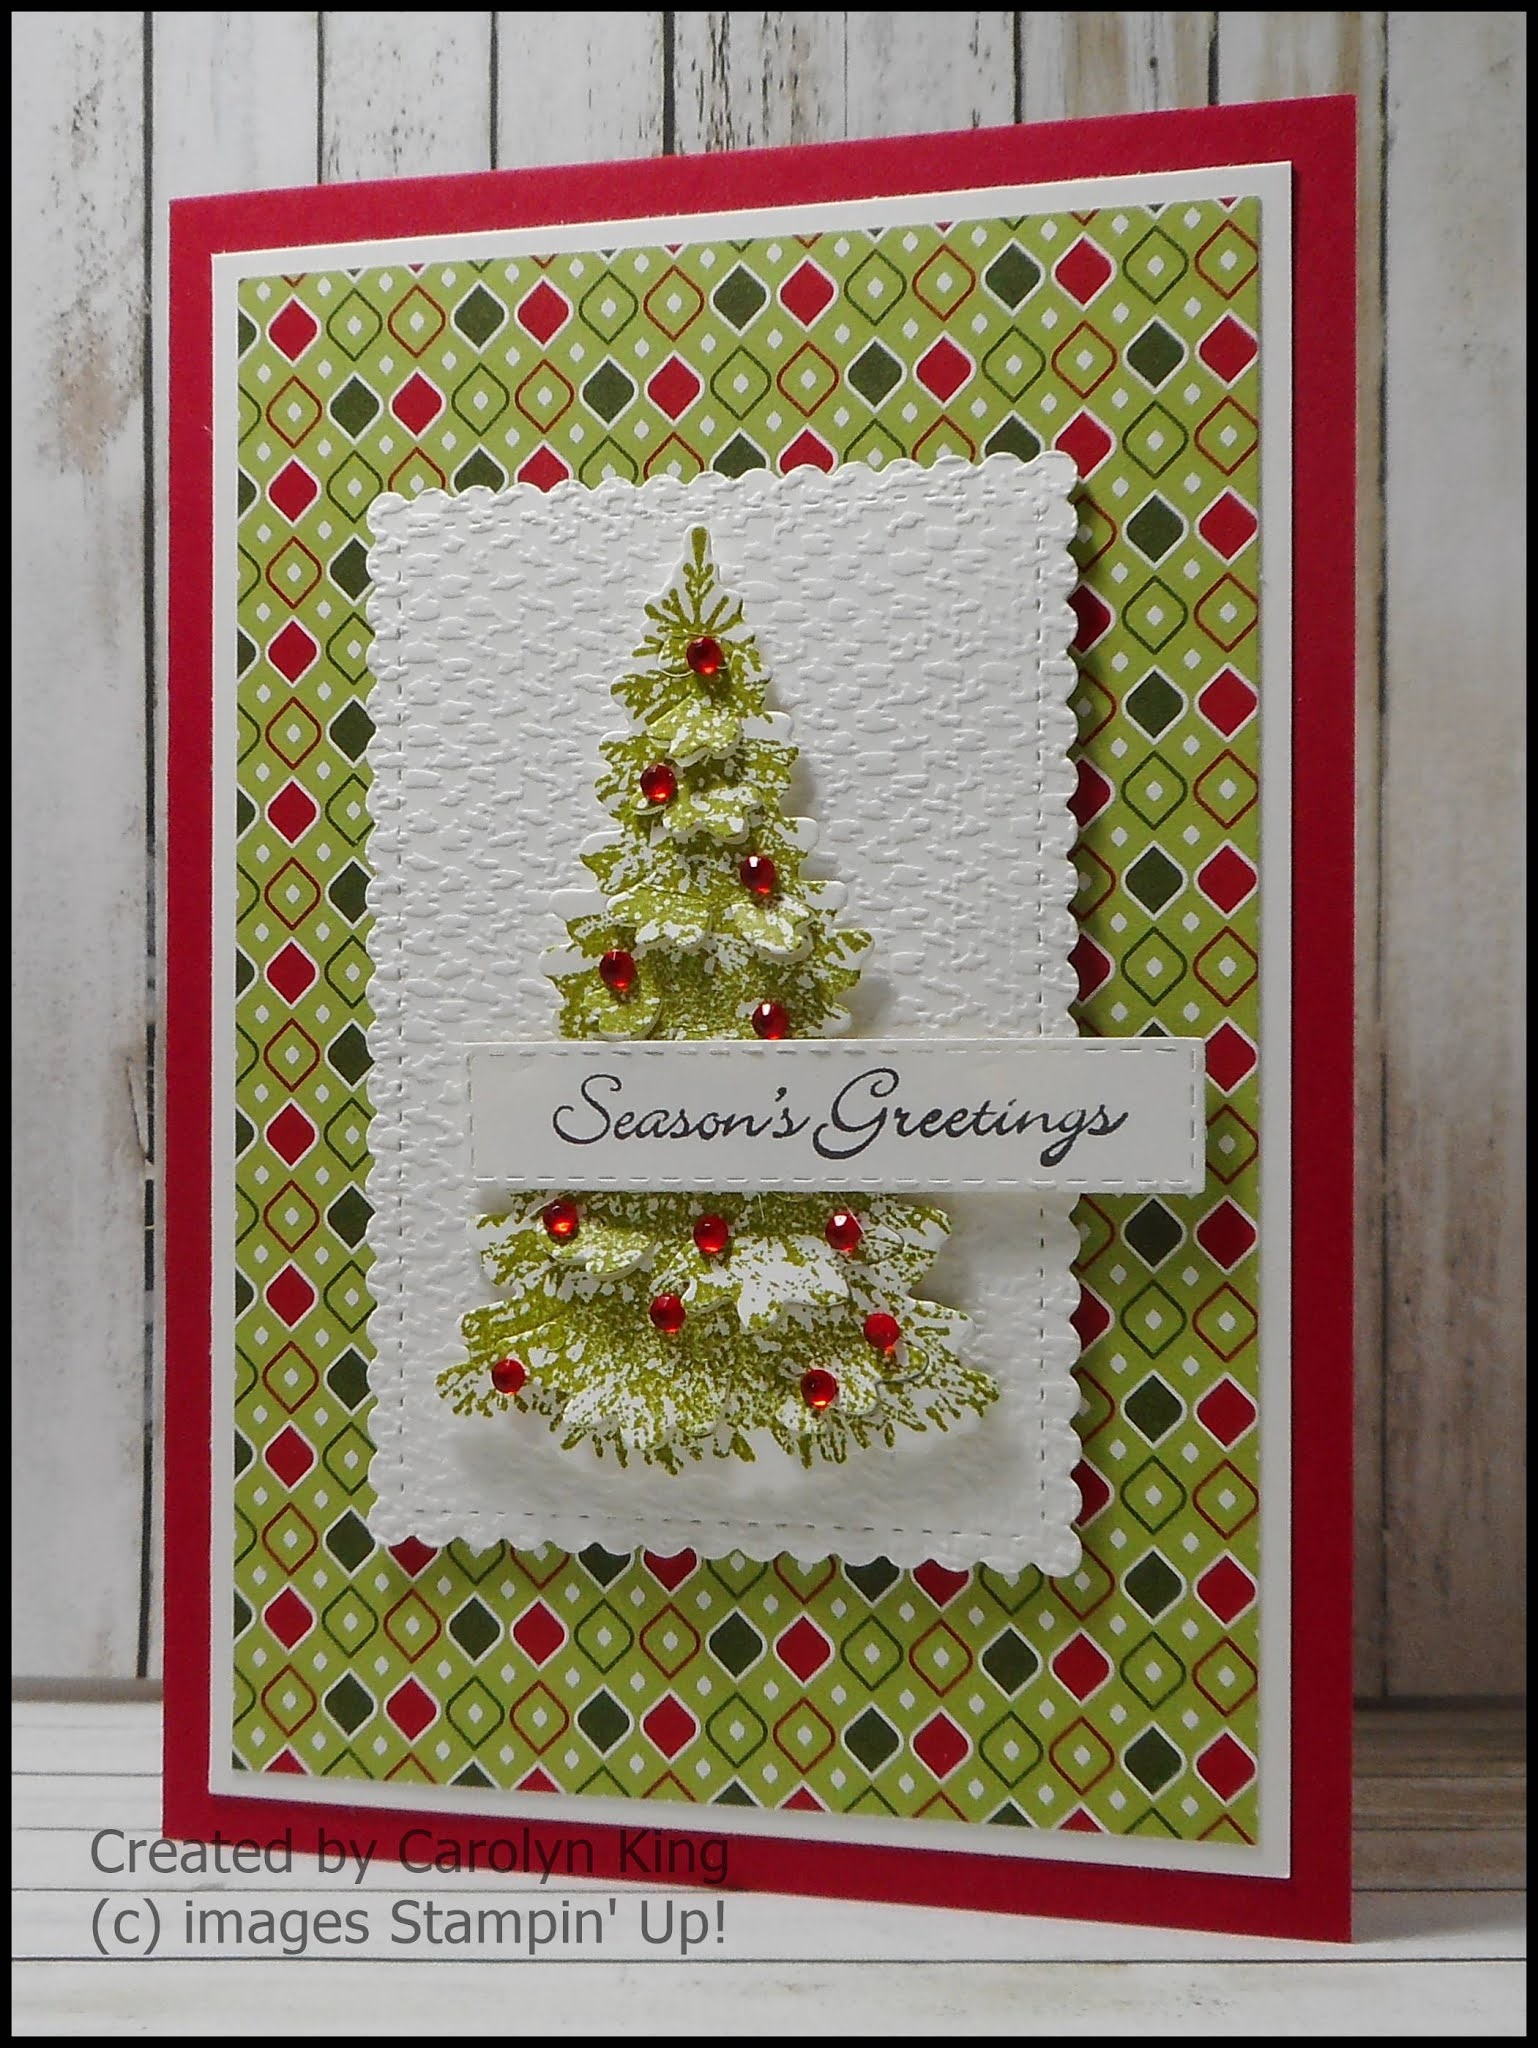
Hi everyone, sharing a quick and easy Christmas Card using Winter Woods Stamp Set and the In The Woods dies.


The card base is Real Red with the Whisper White mat being cut at 13.8cm x 9.5cm.  The Wonder of the Season Specialty Designer Series Paper was cut at 13.3cm x 9cm.

To create the centre panel cut a piece of Whisper White cardstock using the largest Scalloped Stitched Rectangle from the Stitched So Sweetly dies.  This was then embossed using the Tasteful Textile 3D embossing folder.

Stamp the tree image from the Winter Woods stamp set using Old Olive ink on a piece of Whisper White cardstock and then die cut using the In the Woods dies.    Some Red Rhinestone Basic Jewels were used to decorate the tree.

The sentiment is from the Itty Bitty Christmas stamp set.  This was stamped using Black Memento ink and die cut using the smallest Stitched Rectangle Die from the Stitched Rectangle Dies.

Hope you enjoyed this quick and easy Christmas Card.  It is perfect to make some Christmas Cards in a hurray.

If you live in Australia

you can get all the supplies you need
for this project from me.

You can place an order online or Contact Me and place an order. 


Thank you for visiting.
Carolyn


Tuesday, 20 October 2020

Joy to the World

Hi everyone, sharing a Christmas Card made using some not so traditional Christmas colours.  

This card is made using the Flowers for Every Season 15.2cm x 15.2cm Designer Series Paper and two of the 2020-2022 In Colors Cinnamon Cider and Just Jade.


I actually just used my offcuts from previous projects on this card, so the pieces of Designer Series Paper have not actually been cut to any specific size.  I love being able to just pick up leftover pieces from previous projects and arrange them on a card front until I like the card layout that I have created.

The Cinnamon Cider background was embossed using the Tasteful Textile 3D Embossing Folder.  The Gold Laser-Cut piece behind the ribbon and sentiment circle is from the Forever Gold Laser-Cut Specialty Paper.

I have used the Itty Bitty Christmas Stamp Set for the sentiment.  This was cut out using the smallest circle in Stitched Shapes dies and a Cinnamon Cider circle cut using the next size up was cut for a backing.  I offset the circles to give a little more interest and to also allow space for the Gold Enamel Glitter Dots.  The ribbon behind the sentiment circles is from the Forever Greenery Trim Combo Pack.

Hope you enjoy this not so traditional coloured Christmas Card.

If you live in Australia

you can get all the supplies you need
for this project from me.

You can place an order online or Contact Me and place an order. 


Thank you for visiting.
Carolyn

Tuesday, 18 August 2020

Most Wonderful Time

Hi everyone, I have been having a little play with the Most Wonderful Time Product Medley kit.  This kit has so many goodies in it perfect for making your Christmas cards this year.


My first card uses one of the Gold Foil card fronts, a piece of the Designer Series Paper along with some stamped die cut images, stickeers, trim and gold star embellishments.

The Christmas Tree was stamped using Old Olive ink on Whisper White cardstock.  I then coloured the tree using a Blender Pen and Pear Pizzazz ink.  I then added some candy canes which were stamped using Real Red ink.

For my second card I used a piece of the Designer Series Paper that I matted onto a piece of Gold Foil Sheet.  The sentiment on this card is from the Itty Bitty Christmas stamp set and was die cut using the Tasteful Labels Dies.  The deer is one of the stickers from the kit that I popped up with Mini Dimensionals.  I added some of the gold trim behind the sentiment along with some Gold Foil Sheet stars from the Stitched Stars.

If you live in Australia

you can get all the supplies you need
for this project from me.

You can place an order online or Contact Me and place an order. 


Thank you for visiting.
Carolyn

Wednesday, 18 December 2019

Tag Topper Punch Christmas Box

Hi everyone, sharing a little Christmas Box made using the Tag Topper Punch.  This is the third project that the ladies made last Sunday in class.


I do not know who actually designed these little boxes as there are several versions that I have found, however I followed the tutorial by Angie Juda here, so thank you Angie.

I just changed the decoration as I have used the Wrapped in Plaid Designer Series Paper Pack, Shaded Spruce and Gold Glimmer Paper sprigs made using the Sprig Punch with the sentiment from the Itty Bitty Christmas stamp set.  This was die cut using the Stitched Oval from the Stitched Shaped Dies and layered onto a Cherry Cobbler Scalloped Oval die cut using the Layering Ovals Dies.

A few Gold Glimmer Enamel Dots were added to finish.

If you live in Australia

you can get all the supplies you need
for this project from me.

You can place an order online or Contact Me and place an order. 


Thank you for visiting.
Carolyn