Showing posts with label Best Bunny. Show all posts

Wednesday, 29 May 2019

Mr Pelican

Hi everyone, sharing two of the projects the ladies made at the June class.  They had a lot of fun colouring the image and creating the matching gift bag.  I always seem to make the gift bags for ladies so it was great to make a little gift bag for the men in our lives.


The card uses the Postcard Pals stamp set and the same colour combination that I used in the Tuesday Challenge #15 card.  I love this combination and the image was a great one to introduce the ladies again to the Stampin' Blends.


The little gift bag was made using the Gift Bag Punch Board. Best Bunny Stamp set, the 1 1/4" circle punch and the 1 3/8" scallop circle punch.


If you live in Australia
you can get all the supplies you need
for this project from me.

You can place an order online or Contact Me and place an order. 


Thank you for visiting.
Carolyn

Tuesday, 19 February 2019

Tuesday's Challenge #1

Hi everyone, are you like me and get all excited about the new catalogues and all the new stamps, paper, dies and embellishments we get to play with? 

What I have noticed is that with all this excitement about the 'new stuff' that I tend to forget about the gorgeous stamp sets, paper, dies and embellishments that are in the Annual Catalogue. So I have set myself a challenge, I have called it 'Tuesday's Challenge', to use a stamp set and other goodies from the Annual Catalogue to create a card or other project each week. 

This is my first project using the Best Bunny stamp set and the Bunny Builder punch.  I cased the Bunny Element from the Annual Catalogue, just changed up the design of the card.


I also used Brusho (these had gone off my radar completely), Gold Mini Sequin Trim and Metallics Sequin Assortment.

If you live in Australia
you can get all the supplies you need
for this project from me.

You can place an order online or Contact Me and place an order. 


Thank you for visiting.
Carolyn

Saturday, 2 February 2019

Easter Baskets

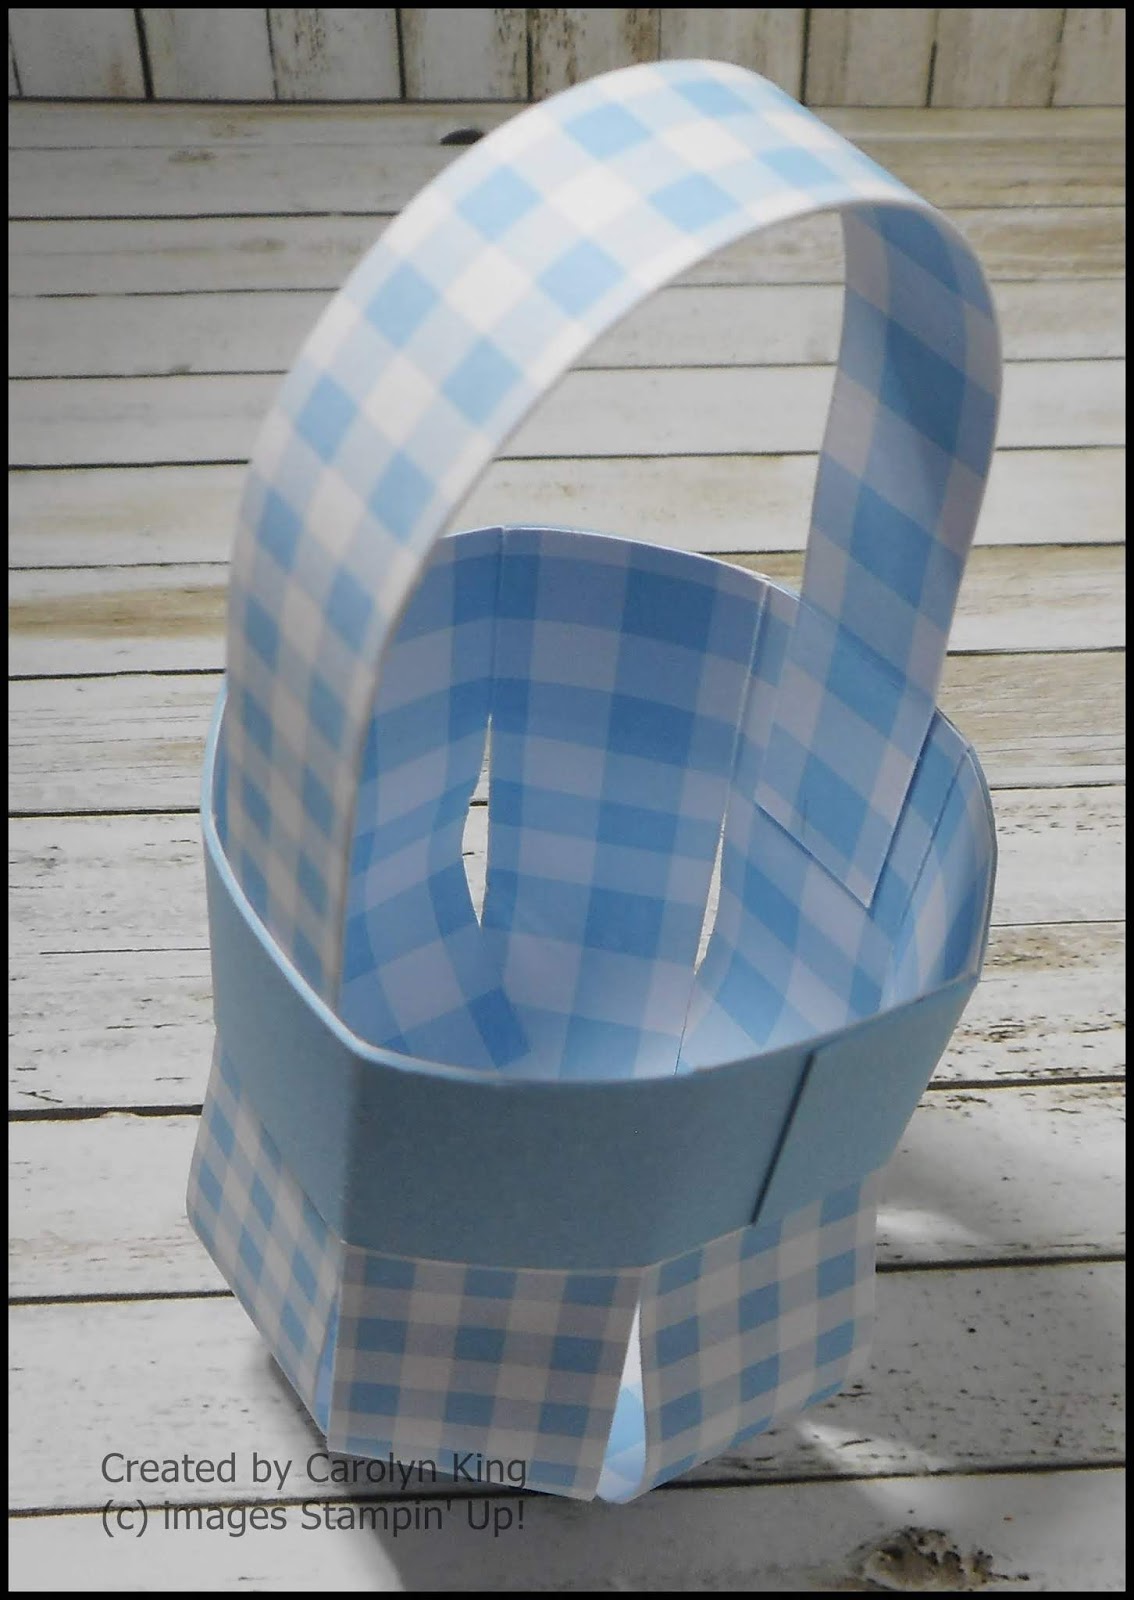
I know it is a bit early for Easter but when I found these gorgeous little baskets on Pinterest made by Caroline from CraftyCarolineCreates I just had to try them out.


I have change how the basket is put together slightly as I wanted to use the Gingham Gala 6" x 6" paper pack and one of the pieces measures 3/4" x 6 1/2" so I was not going to get this strip out of this paper pack.  So I got my thinking cap on and cut a piece of coordinating cardstock at 3/4" x 6 1/2" to adhere my Designer Series Paper strips to.  

To make this basket you will need:

Designer Series Paper - 4 pieces cut at 3/4" x 6"
Designer Series Paper - 1 piece cut a 1/2" x 6" (handle)
Cardstock - 1 piece cut at 3/4" x 6 1/2"


To put the basket together put two strips of Tear & Tape on the back of the piece of cardstock and adhere the 4 pieces of 3/4" x 6" to this with the side you want facing out face down.


You then take the bottom of the first strip and adhere this to the cardstock strip, continuing until the 4 pieces are adhere.


This is what it looks like once the 4 strips have been adhered in place.


Join the top together to form the basket base.


Put Tear & Tape on the handle ends, make sure that this is the right side facing up.  Adhere to the inside of the basket.


The handles do show on the inside but once you have your chocolates in the basket you will not see them.

I decorated the baskets with the Best Bunny stamp set and the Bunny Builder Punch.  I stamped the Bunny imaged using Soft Suede ink and I coloured him or her using the Early Espresso and Flirty Flamingo Watercolour Pencils and a Blender Pen.

I set the images up on the Stamparatus so that they can be stamped and then punched out in one go.  This is great if you are wanting to make multiples of these little bags.

The 'Easter Blessings' sentiment is from the Itty Bitty stamp set, stamped in Soft Suede and trimmed to size.

I adhered the Bunny in place to cover where the join of the basket base is.  This is not necessary, however I like the finished effect with the join covered.


If you live in Australia 

you can get all the supplies you need

 for this project from me. 

You can place an order online or Contact Me and place an order.


Thank you for visiting.
Carolyn  

Sunday, 22 July 2018

Happy Birthday To You

Hi everyone, just sharing a quick and easy card with you using the Wood Textures Designer Series Paper.


I love this paper pack, but I will admit when I first opened it and saw the sheet with all the logs on it I thought how would I use that paper.  Well I can tell you that it has become my favourite sheet in the paper stack, I get rather frugal when cutting it so that I can get as many cards as possible out of the sheet.

I have used a standard Basic Black card base for my card, a piece of the lighter Wood Textures Designer Series Paper cut at 14.3cm x 10cm, a Basic Black cardstock strip cut at 10.5cm x 2cm with the centre panel being Basic Black cardstock 6cm x 10.3cm and the Log patterned paper cut at 5.5cm x 9.8cm.  The sentiment is stamped on a piece of Very Vanilla and cut out using the second smallest square Stitched Shape Framelit and layered onto a Basic Black scalloped square cut using the Layering Square Framelits.  The sentiment is from the Best Bunny stamp set.  The finishing touches are a Copper Leaves Trinket and two Silver Faceted Gems which I coloured with the Bronze Stampin' Blend.

If you live in Australia 
you can get all the supplies you need

 for this project from me. 

You can place an order online or Contact Me and place an order.


Thank you for visiting.

Carolyn
 

Sunday, 1 July 2018

Best Bunny Birthday

I was having withdrawal symptoms this morning from watching everyone card making yesterday at the fundraiser I held.  I was busy helping everyone so had no opportunity to stamp.  This is what I made using the Best Bunny stamp set, Bunny Builder punch along with several other stamp sets, punches and dies.  


I just needed a little creative fix before unpacking from yesterday and putting everything back where it belongs.

If you live in Australia 
you can get all the supplies you need

 for this project from me. 

You can place an order online or Contact Me and place an order.


Thank you for visiting.

Carolyn
 

Saturday, 30 June 2018

Casing the Catty

I am holding a fundraiser today for the Junior Diabetes Research Foundation.  My great niece was diagnosed with Type 1 Diabetes when she was 18 months old.  She is now a bubbly 5 year old.

I have 32 ladies attending who will be making 8 projects during the day.   A lot of fun is usually had by all, and my friend Danielle makes these Lemon Meringue cupcakes for everyone that are to die for.  I feel my hips expanding just by looking at them.

I cased the catalogue for this card the ladies will be making today.  I just love how the Best Bunny stamp set was used.  My design for the card is different from the catalogue, however the Bunny Panel is a direct case.


Stay tuned as I will be posting a few more projects that the ladies made today over the next week.

If you live in Australia 
you can get all the supplies you need

 for this project from me. 

You can place an order online or Contact Me and place an order.


Thank you for visiting.

Carolyn
 

Sunday, 24 June 2018

Welcome Little One

How cute is the Bunny from the Best Bunny stamp set!


I stamped the images using Momento ink and then coloured with Stampin' Blends.   After colouring I punched out the pieces for the bunny using the Bunny Builder punch and layered them together to make the bunny.  The carrot was fussy cut.

The patterned paper is from the Twinkle Twinkle Designer Series Paper pack, I team this with a card base of Gray Granite and added some Whisper White and Grapefruit Grove.

If you live in Australia 
you can get all the supplies you need

 for this project from me. 

You can place an order online or Contact Me and place an order.


Thank you for visiting.

Carolyn