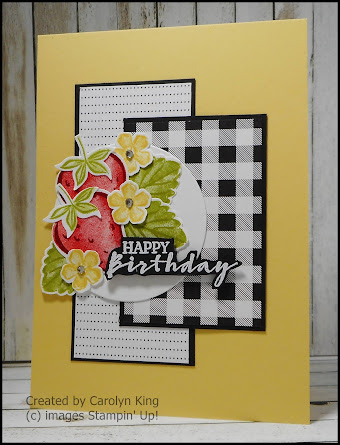
Hi everyone, another project from the cards made by the ladies at the Juvenile Diabetes Research Foundation fundraiser held on 26 June.
This card uses the Sweet Strawberry stamp set, Strawberry Builder punch and the Pattern Party Designer Series Paper Pack.
To make this card
1.
Fold the Poppy Parade card base in half2. Emboss
the Basic White cardstock (12.3cm x 8cm) piece using the Bark 3D Embossing Folder and adhere
to the Basic Black mat (12.7cm x 8.4cm) Adhere to the
card front.
3. Adhere
the Designer Series Paper (6.4cm x 10.2cm) to the Basic Black (6.8cm x 10.6cm) mat and adhere to the card front.
4. Adhere
the Petal Pink 5/8" Organdy Striped ribbon in place.
5. Stamp
the sentiment using Basic Grey ink and die cut using the Stitched So Sweetly dies before adhering to the card
front using Dimensionals.
6. Stamp
the solid Strawberries using Poppy Parade and then the accents using Cherry
Cobbler before punching out.
7. Stamp
the leaves using Pear Pizzazz, solid and outline images, before punching out.
8. Stamp
the small flowers using Petal Pink, solid and outline images, before punching
out.
9. Stamp
the outline image of the Strawberry Calix on Garden Green cardstock before
punching out. Adhere these to the top of
the Strawberries.
10. Arrange
all the Strawberries, leaves and small flowers on the card front.
11. Add
some Champagne Rhinestones to the centres of the small flowers.
12. For
the card inside stamp the Strawberries and Calix as above on the piece of Basic
White cardstock. Mat the Basic White
cardstock on the Basic Black cardstock and then adhere to the card inside.
If you live in Australia
you can get all the supplies you need
for this project from me.
You can place an order online or Contact Me and place an order.
Thank you for visiting.
Carolyn