Monday 30 December 2019

Magnolia Lane Monday

Hi everyone, over the next couple of months, each Monday I will be sharing cards that I have made using the Magnolia Lane Memories & More Card Pack.  I have also used other products from the Magnolia Lane Suite.

I will show tips on how to use the stickers in the card pack, how to use the printed vellum sheets and the cards themselves.  I decided to use the Magnolia Lane Large Specialty Memories & More Cards and Envelopes for the majority of the cards that I have designed.  I love the natural kraft look of these cards and envelopes.

Week one uses the printed vellum sheets in the card pack.


You can leave the vellum sheet untouched just backing it onto a piece of Whisper White cardstock, creating a monochromatic card with a natural look.  I just cut the vellum sheet in half to fit the card front, this way you get two cards from the one sheet.  The ribbon is from the Magnolia Lane Ribbon Combo Pack.

For the inside of this card I second generation stamped the small flower image from the Magnolia Blooms stamp set using Early Espresso ink.


Or you can colour the vellum sheet, again backing onto a piece of Whisper White cardstock.  I have coloured this piece with the Petal Pink (Light & Dark) and Mossy Meadow (Light & Dark) Stampin' Blends. Again I have cut the vellum sheet in half to fit the card front.

This card uses one of the flower stickers as a focal point on the sentiment circle.  I decided to offset the middle circle just to add a bit more interest and it left room for the rhinestones which is a great little extra.  The ribbon is the Petal Pink Organdy Striped Ribbon, matches perfectly with the colours in the flowers.

For the inside of the card I used the small leaf image sticker that is not coloured, just the outline image.

This is another card, here that I have made previously using one of the vellum sheets from the Magnolia Lane Memories and Card Pack.

If you live in Australia

you can get all the supplies you need
for this project from me.

You can place an order online or Contact Me and place an order. 


Thank you for visiting.
Carolyn

Saturday 28 December 2019

Let the Paper Do the Talking

Hi everyone, have you ever been overwhelmed on how to use some of the Designer Series Paper?  I love the new Parisian Blossoms Specialty Designer Series Paper, just gorgeous.  Too pretty to cover up, so I designed a card that lets the paper do the talking.


I have kept the sentiment panel very simple and plain so that the gorgeous background Designer Series Paper shines through.

The sentiment is from the Forever Blossoms stamp set and was die cut using the Stitched So Sweetly Dies.  This I backed onto a Basic Black Stitched Shaped Circle and adhered to the card using Dimensionals.

The little flower and leaves are from the same Forever Blossoms stamp set and were stamped using Black Memento ink and cut out using the Cherry Blossoms Dies.  The flower was coloured using Petal Pink Stampin' Blends (Light and Dark).

Thank you for visiting.
Carolyn

Friday 27 December 2019

Amour

Hi everyone, hoping you had a Merry Christmas and enjoyed your time with your family and friends.  I had a lovely time with family, I even caught up with my cousin and his wife who I have not seen for about 2 years which was fantastic.

I had time today to have a little play with some of the new products coming in the new Mini Catalogue on 2 January 2020.  OMG, 2020, it does not seem that long ago it was all the hype about 2000 and the end of the world.


For my card I have used products from the Parisian Blossoms Suite, using the Parisian Beauty stamp set along with the Parisian Dies and the Cherry Blossom Dies.   The sentiment was cut using the Stitched So Sweetly Dies. I know that I will be using this Die set a lot, it it is amazing.

There is a lot going on on my card, I got a little carried away,  But hey you cannot have enough flowers right!

The background I stamped using Sahara Sand ink using the images from the Parisian Beauty stamp set.  The sentiment is also from this stamp set.

The rest of the card is all die cutting and layering, with the addition of the Champagne Rhinestones for the small flower centres.

Thank you for visiting.
Carolyn

Tuesday 24 December 2019

Perfectly Plaid Gift Boxes

Hi Everyone,

Wishing you all a Merry Christmas and a Happy New Year!


I was just going through everything for tomorrow and I realised that I had not made the packaging for my nephews Christmas presents.  I usually give them money as they are teenagers and I never know what to give them, this way they can get what they really want.

I quickly had a think about what I had in my stash that I could easily turn into a little gift box.  The Gold Mini Pizza Boxes are perfect, I teamed them with the other products in the Wrapped in Plaid Suite and this what I came up with.


I made a little gift card to go in the box, using the same decoration on the box front for the card inside, folded up the money and it fitted in perfectly.


I had to make two of these little gift boxes and cards, and it only took me 20 minutes, how quick and easy was that.

If you live in Australia

you can get all the supplies you need
for this project from me.

You can place an order online or Contact Me and place an order. 


Thank you for visiting.
Carolyn  

Monday 23 December 2019

Three Cheers For You Card Kit Alternatives ...

Hi everyone, as promised sharing the six cards I made with the left over elements from the 'Three Cheers For You' card kit.


It does not show up very well in the photo, but the background behind the sentiment panel has been stamped using Seaside Spray ink and the solid image from the Artisan Textures stamp set.


I have kept the card sketch the same, but have created the background on these two cards using White Embossing Paste and the Pattern Party Decorative Masks.


These cards are quick and easy to make as the elements do a lot of the work for you.


These next three cards use the same sketch with the backgrounds being created the same way as the previous three cards.


I love how just by changing the card base you get a slightly different look on each card.


I did not have any of the kraft elements left for this card, but I still like the finished card, just slightly different.

Thank you for visiting.
Carolyn

Sunday 22 December 2019

Something Retiring,Something Brown, Something Current and Something New ....

Hi everyone, hands up those craft-a-holics that have a heap of Designer Series Paper and never seem to get around to using it.  I will put my hand up as a serial offender.

I bought the 'Come to Gather' Designer Series Paper Pack months ago and have only made one card with it.  So I set myself a little challenge to use a piece 6" x 12" and see what I could create.  Not sure if I should call this is a half sheet wonder or not, lol.

Something Retiring - 'Come to Gather' Designer Series Paper
Something Brown - Early Espresso Cardstock and ink
Something Current - Daisy Lane Stamp Set, Medium Daisy Punch
Something New - Label Me Bold Stamp Set


All the cards use the same basic elements, the only change is the card sketch and the background label or circle.


 I cut the piece of Designer Series Paper into the following sizes for the cards

  • 4 pieces 5.1cm x 14.8cm
  • 2 pieces 5.1cm x 10.5cm
  • 1 piece 5.1cm x 10.1cm


I have used a colour theme of Early Espresso, Whisper White and Gold for all the cards.


The sentiments are from the new 'Label Me Bold' stamp set.  I have only used the Happy Birthday and the Congratulations stamps in the set, but there are five more sentiments and five other stamps that are great for creating backgrounds.


I have used dies from the 'In The Woods' and 'Frosted Frames' dies.


The daisy flower centres are the Gold Faceted Gems, these are great for flower centres.


The Gold Glitter Enamel Dots are from the 'Christmas Time is Here' suite, they perfectly match the Gold part of the card theme.


A Linen Thread Bow was added to finish.

I had a lot of fun making these cards, and the good thing is that I can make another one of each from the other piece of 6" x 12" Designer Series Paper.  That is 14 cards from the one 12" x 12" sheet of patterned paper.

You can buy everything now (apart from the Label Me Bold stamp set).  The Designer Series Paper is retiring at the end of December so do not miss out.

If you live in Australia

you can get all the supplies you need
for this project from me.

You can place an order online or Contact Me and place an order. 


Thank you for visiting.
Carolyn  

Saturday 21 December 2019

Three Cheers For You Card Kit

Hi everyone, sharing the cards I made using the 'Three Cheers For You' card kit that is coming in January as part of the new Mini Catalogue.

I made the cards mostly as they were in the kit, just changing up the sentiment to suit the cards that I need.  I did change a couple of cards slightly and I also made a small mistake with one of the sheets of elements.  I used the wrong one, but all was not lost as it still worked out. Just a tip with the kraft printed sheets, there is one that is slightly different, this is where I made my mistake.


This is the card that I used the wrong kraft printed element on, the correct element is slightly wider.  It still looked okay so I was not worried about it.


This card I change the layout slightly and the sentiment.


This card I made exactly as per the kit.


The final card is the one that I change the layout of.  I love the blue flower elements and they were hidden in the design in the kit, so I brought it to the front of the sentiment panel.

In the kit you get a few extra bits (I assume just in case of stamping mistakes) and as I also change the layout a little I had enough leftover elements to make six more cards.  I will post these during week, they are very different than those in the kit.

I love card kits as they make card making so easy and they are great it you are needing to make a card in a hurry.

There are several card kits available in the Annual Catalogue that you can order now, or you can wait a couple of weeks and purchase the 'Three Cheers For You' card kit.

If you live in Australia

you can get all the supplies you need
for this project from me.

You can place an order online or Contact Me and place an order. 


Thank you for visiting.
Carolyn 

Wednesday 18 December 2019

Tag Topper Punch Christmas Box

Hi everyone, sharing a little Christmas Box made using the Tag Topper Punch.  This is the third project that the ladies made last Sunday in class.


I do not know who actually designed these little boxes as there are several versions that I have found, however I followed the tutorial by Angie Juda here, so thank you Angie.

I just changed the decoration as I have used the Wrapped in Plaid Designer Series Paper Pack, Shaded Spruce and Gold Glimmer Paper sprigs made using the Sprig Punch with the sentiment from the Itty Bitty Christmas stamp set.  This was die cut using the Stitched Oval from the Stitched Shaped Dies and layered onto a Cherry Cobbler Scalloped Oval die cut using the Layering Ovals Dies.

A few Gold Glimmer Enamel Dots were added to finish.

If you live in Australia

you can get all the supplies you need
for this project from me.

You can place an order online or Contact Me and place an order. 


Thank you for visiting.
Carolyn 

Tuesday 17 December 2019

Two for One ....

Hi everyone, sharing another of the class projects that the ladies made last Sunday.

The two cards are very similar, with the centre panel cut from the same piece of Feels Like Frost Designer Series Paper.


I cut the paper at 11.8cm and then into two 11.8cm x 7.5cm pieces.


These cards are very quick and easy to make and use the Peaceful Boughs Bundle.

If you live in Australia

you can get all the supplies you need
for this project from me.

You can place an order online or Contact Me and place an order. 


Thank you for visiting.
Carolyn 

Sunday 15 December 2019

One More Christmas Card ....

Hi everyone, sharing one of the projects the ladies made in class today, and yes it is another Christmas card.  I have two more projects from class today that I will post over the next few days.


I have used the Feels Like Frost Designer Series Paper for the background and the So Many Stars Bundle.   I had these pieces of Designer Series Paper left from a previous project and they were just perfect for the background to the stars.

The stars in the middle have had some Ice Stampin' Glitter added to give a little sparkle .

If you live in Australia

you can get all the supplies you need
for this project from me.

You can place an order online or Contact Me and place an order. 


Thank you for visiting.
Carolyn 

Monday 9 December 2019

Feels Like Frost ...

Hi everyone, sharing 4 cards I made using the gorgeous 'Feels Like Frost' Designer Series Paper.  My cards to day show the versatility of this paper, it is perfect for Christmas Cards but can also be used for other occasions.

I needed to make some more Sympathy cards for the card stash at work.  I sell these cards with the proceeds going to the fundraising efforts of our WA Cancer Council Relay for Life Team.


I have cut a strip from the top of the piece of Designer Series Paper so that the piece is 11.8cm, I then cut it into two 7.5cm strips.  You get two cards from the one piece of 6" x 6" Designer Series Paper.  The strip from the top I cut into a 10cm length and then cut this in half lengthwise to give me two strips for the inside of each of the cards.


This is the second card I made with the other piece of the Designer Series Paper.  The layout is very simple as the gorgeous paper does all the work.


Using the same sketch I made some blue ones for the men folk.


I will admit that I had a bit of trouble cutting up this paper pack as it is just so pretty.  You get 48 sheets 6" x 6", 4 each of 12 designs.  The reverse side of the paper also has beautiful silver and white designs.
If you live in Australia

you can get all the supplies you need
for this project from me.

You can place an order online or Contact Me and place an order. 


Thank you for visiting.
Carolyn 

Wednesday 4 December 2019

Season's Greetings ...

Hi everyone, sharing one more of the projects from last weekend's 'All Things Christmas' event.

This card uses the Toile Tidings Designer Series Paper and the Peaceful Boughs Bundle.


The card base is one of the Magnolia Lane Large Specialty Memories and More cards and envelopes.

This card has a bit of a vintage feel to it that I really love.

If you live in Australia

you can get all the supplies you need
for this project from me.

You can place an order online or Contact Me and place an order. 


Thank you for visiting.
Carolyn 

Tuesday 3 December 2019

Ho, Ho, Ho

Hi eveyone, sharing another project from the 'All Things Christmas' event.

This project uses products from the Wrapped in Plaid Suite.


This project is great for using the 6" x 6" paper packs.  By cutting the strips 5cm x 10.5cm you can get 4 cards from the two pieces of Designer Series Paper.

The centre panel piece of Whisper White was emboss using the Sutble Embossing Folder.

The 'Ho, Ho, Ho' was stamped using the Gold Delicata Metallic ink.  As an alternative you could Gold heat emboss this instead.

I did use some of the Gold Shimmer Ribbon from the Christmas Time is Here Suite and some Red Rhinestones to finish the trees.

If you live in Australia

you can get all the supplies you need
for this project from me.

You can place an order online or Contact Me and place an order. 


Thank you for visiting.
Carolyn 
Monday 2 December 2019

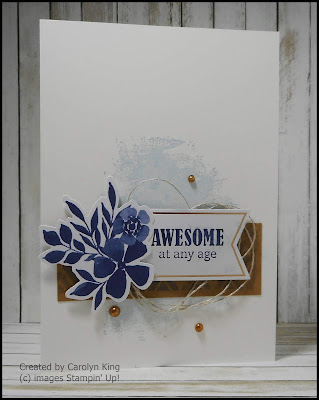
Christmas Bag

Hi everyone, sharing another of the projects from last weekend's 'All Things Christmas' event.

This little gift bag uses products from the  'Christmas Time is Here' Suite.


The little kraft bag I purchased at my local Pricesavers Store, they come in packs of 3 for $4.50.

The flower was die cut from the beautiful Designer Series Paper with the matching die with the pieces of Designer Series Paper behind the flower being cut using the Stitched Nested Label dies.  The sentiment was White head embossed before being die cut with the smallest of the Stitched Nested Label dies.

Some of the Gold Glitter Enamel Dots and the Gold Shimmer Ribbon bow were added to finish the bag. 

The ladies were given two bars of my homemade soap that fitted perfectly in this little bag.

This is a quick and easy little gift bag to make for a special present.

If you live in Australia

you can get all the supplies you need
for this project from me.

You can place an order online or Contact Me and place an order. 


Thank you for visiting.
Carolyn 

Sunday 1 December 2019

All Things Christmas ...

Hi everyone, over the next week I will be sharing some of the projects that the ladies made the 'All Things Christmas' event that my friend Marie Byard and I held yesterday. 

This first card is my take on one of the cards on page 40 in the Occasions Catalogue showing the gorgeous Feels Like Frost Suite. 


How to make this card:

1.   Die cut the frame from Smoky State cardstock.
2.   Die cut the two foliage pieces from Smoky Slate cardstock.
3.   Ink the edges of all the pieces just die cut with Night of Navy ink.
4.   Apply some wet glue (very little) and add the Ice Stampin' Glitter.  Set aside to dry while you make the rest of the card.
5.   Stamp the background on the Smoky Slate card base with the Snowflake stamp and Smoky Slate ink.
6.   Stamp the piece of Whisper White cardstock for the inside of  the card with the Snowflake stamp and Smoky Slate ink.  Adhere this to the inside of the card.
7.   Adhere the Silver Foil strips to the Night of Navy piece of cardstock and adhere to the card front using Dimensionals.
8.   Stamp the sentiment on the piece of Designer Series Paper with Versamark ink and White heat emboss.  Add some of the Ice Stampin' Glitter to the bottom of this piece (optional). Add to the frame using Dimensionals and add the two foliage pieces on either side. 
9.   Adhere the piece of ribbon in place.
10. Adhere the frame to the card front using Dimensionals.

If you live in Australia


you can get all the supplies you need
for this project from me.

You can place an order online or Contact Me and place an order. 


Thank you for visiting.
Carolyn 

Sunday 24 November 2019

Merry Christmas...

Hi everyone, sharing one of the projects that the ladies made in class today.

It uses the Christmas Gleaming stamp set and the gorgeous Brightly Gleaming Specialty Designer Series Paper.


To make this card you will need the following:


Measurements

Night of Navy Cardbase
14.3cm x 10cm Very Vanilla mat for card front
14.3cm x 10cm Very Vanilla cardstock (for card inside)
13.8cm x 9.5cm Designer Series Paper
10cm x 7.5cm Night of Navy cardstock
9.5cm x 7cm Designer Series Paper
6.5cm x 6.5cm Night of Navy cardstock
6cm x 6cm Very Vanilla cardstock
Very Vanilla cardstock for the baubles and the sentiment

Technique

Adhere the Designer Series Paper to the cardstock mats and adhere to the card front.

Emboss the 6cm x 6cm Very Vanilla cardstock piece using the Subtle Embossing Folder and then adhere to the Night of Navy 6.5cm x 6.5cm Night of Navy cardstock mat.  Adhere to the card front.

Stamp the Christmas Baubles using Night of Navy, Pretty Peacock and Mossy Meadow ink.  Punch out using the punches from the Gleaming Ornaments Punch Pack and adhere in place on the Very Vanilla 6cm x 6cm square on the card front.  Use dimensionals on one large bauble and one small bauble.

Stamp the 'Merry Christmas' on a piece of Very Vanilla cardstock using Night of Navy ink.  Fussy cut around the edges leaving a small border.  Adhere this to the card front on top of the baubles.

Add a Mossy Meadow linen thread bow and one of the Copper Elements to finish.

For the inside of the card stamp the bauble image on the bottom right of the Very Vanilla 4.3cm x 10cm cardstock piece using Pretty Peacock ink.  Adhere to the card inside.

If you live in Australia

you can get all the supplies you need
for this project from me.

You can place an order online or Contact Me and place an order. 


Thank you for visiting.
Carolyn 

Friday 22 November 2019

Peaceful Boughs

Hi everyone, yes it is another Christmas Card.


I have teamed the Toile Tidings Designer Series Paper with the Peaceful Boughs Bundle along with the Sprig Punch.  This bundle is a great buy and includes the Beautiful Bough Dies and the Peaceful Boughs stamp set.  If you buy the bundle you get 10% off, what a bargain.

I have used the Very Vanilla, Real Red, Old Olive and Soft Suede colour combination again, told you I loved it.

If you live in Australia
you can get all the supplies you need
for this project from me.

You can place an order online or Contact Me and place an order. 


Thank you for visiting.
Carolyn 

Thursday 21 November 2019

Play Date ...

Hi everyone, I had a play date with two of my friends last Sunday to make Christmas Cards.

This is one that I made using products from the Christmas Gleaming Suite.


The Brightly Gleaming Specialty Designer Series Paper is just gorgeous with the Copper accents throughout.

I have used some of the Brightly Gleaming Foil Elements.  I was having difficulty in using these, so I went back to the Catalogue for some inspiration on how to use these and this is what I came up with.

If you live in Australia
you can get all the supplies you need
for this project from me.

You can place an order online or Contact Me and place an order. 


Thank you for visiting.
Carolyn 
Wednesday 20 November 2019

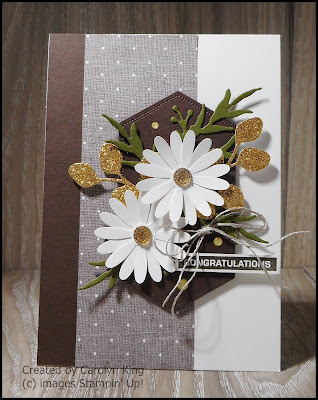
Another of my OnStage Swaps

Hi everyone, sharing the other card that I made for my OnStage Swaps,  similar theme to the first card - Christmas of course.  I love the Real Read, Very Vanilla, Old Olive and Soft Suede combination on these cards.


I used a lot of punches creating this card, the Sprig Punch, Leaf Punch, Delightful Tag Topper Punch, Pine Tree Punch along with the Layering Circle Dies.

The stamp sets used are Perfectly Plaid and Christmas Gleaming.

I coloured the Holly image from the Christmas Gleaming stamp set using Real Red (dark and light) and Old Olive (dark and light) Stampin' Blends.

The background piece of Very Vanilla has been embossed using the Subtle Embossing Folder before being adhered over the strip of Designer Series Paper from the Toile Tidings Designer Series Paper pack.  Can you believe that I am on the 4th pack of this paper, I have a feeling that I might love the colour combination of Real Red and Very Vanilla.

If you live in Australia
you can get all the supplies you need
for this project from me.

You can place an order online or Contact Me and place an order. 


Thank you for visiting.
Carolyn